My Generator: Hard Lessons Learned

I consider a home generator to be one of the more important preparedness items for coping with the very steep learning curve we’d all go through while adjusting to a TEOTWAWKI situation. While finite fuel supplies will limit its usability for most of us to just a few months at best, with our own generator the immediate aftermath of a permanent grid-down world would be much more tolerable during the first few days and months of adjusting to the “new normal”.

Based on my own preps test a year ago (My Ten-Day Test-My-Preps Adventure Part 1, Part 2, Part 3, Part 4), if the SHTF we’ll discover we’re not quite as prepared as we had hoped to be. There are too many variables, some of which we couldn’t possibly have thought of and prepared for as I’ll soon demonstrate. The last thing to be worried about while making the transition is the availability of electricity. Based on our current lifestyles, it’ll be very difficult adjustment when it’s gone.

This article relates two major problems I experienced with my portable 5000-watt generator in the past year, one during the aforementioned 10-day preps test, the other this past summer during my monthly generator test. This article also explains how the problems were solved, how to avoid them, and how many people could fix these problems today even without much mechanical aptitude. The end of the article has a list of suggestions for generator owners and how to prepare ourselves for a continuation of electricity if the SHTF while we’re struggling to adjust to our new grid-down life.

The Background

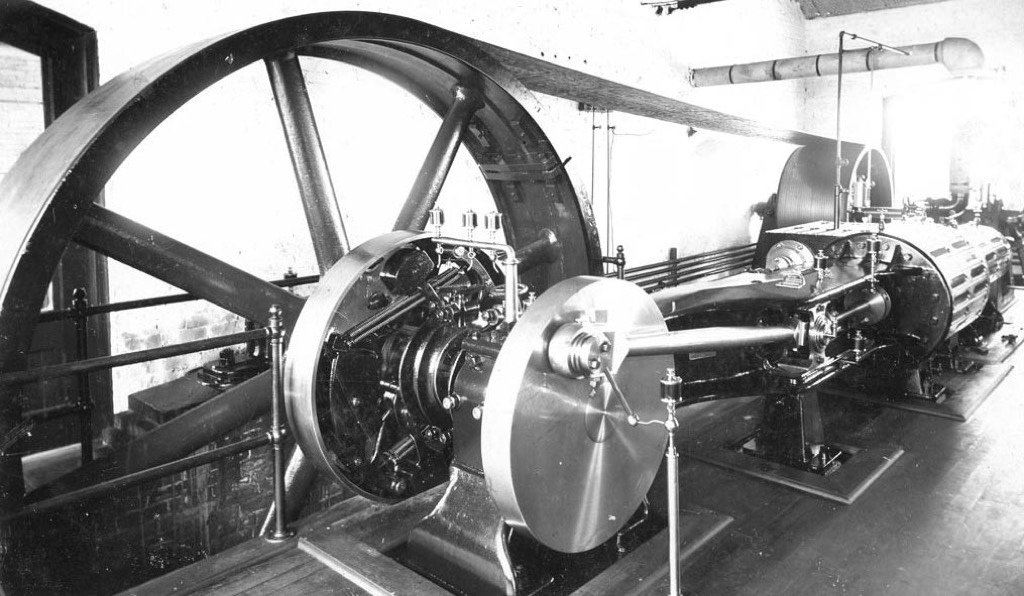
During my preps test which started around 8 PM, all went well the first night but trouble began the next morning when I tried to fire up the generator. It was soon obvious it wasn’t going to run. I was so swamped with other things I wasn’t even able to look at the generator for a few days. Later in the week while investigating the carburetor I discovered that due to my negligence in maintaining the engine and doing monthly tests, the needle valve which controls fuel flow was gummed in place. Worse yet, I managed to ruin it while disassembling the carburetor for cleaning, rendering the generator useless. Since I was simulating a TEOTWAWKI event, there was no way to replace the needle valve or buy a new carburetor. I spent the entire ten days without my generator which proved to be the single biggest wrench in the works. Fortunately, my 500-gallon water tank held 400 gallons or I’d have been in some serious trouble with no way to pump water from the well.

The second problem occurred recently during the monthly test. After completing the test, the engine fell out as I was putting the generator back in storage. It’s not something I could have anticipated so it wasn’t something I had prepared for.

While the needle-valve issue was impossible to fix while simulating a SHTF situation,…
Continue reading

Simplify Planting Heavy Trees With A Wooden Ramp

Potted trees can be purchased in many sizes. Tiny trees might come in a pot as small as 1 gallon in size. I commonly plant fruit trees from 7- and 10-gallon pots. Much larger sizes are also available, and the larger the tree, the closer you are to having a magnificent specimen in your yard or orchard.

But here’s the problem: While large pots support older and larger trees, they’re also heavy and can be difficult to move around. As pots increase in size, the volume of soil they hold follows suit, and soil can be very, very heavy. Planting trees from large pots can be difficult … but it need not be an insurmountable challenge. In fact, it can be surprisingly simple. And you don’t necessarily need much machinery to help.

Dealing with Large Fruit Trees

This spring, I was shopping at my favorite nursery when a couple of impressive apple trees caught my attention. They were every bit of 12 feet tall, and one was loaded with just-forming apples. They were gorgeous specimens at very reasonable prices given their size, and I decided they had to come home with me.

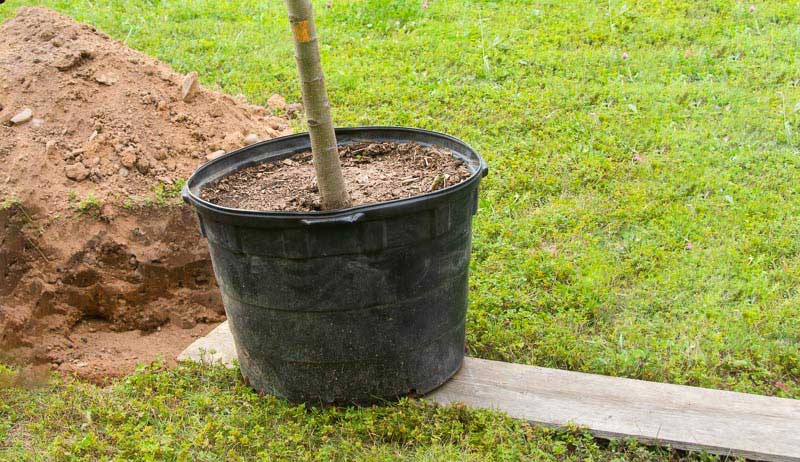
The problem was, the trees were growing in 25-gallon pots. The soil in a 25-gallon pot probably weighs close to 300 pounds, and when combined with the weight of a tree (with lush leaves and apples) … I knew moving and planting those potted trees wouldn’t be easy.

Shipping the trees home was the easy part. I paid for delivery, and the nursery kindly brought the trees to my front yard, where a strong deliveryman used a dolly to roll the heavy trees down a ramp and drop them off. The tricky part would be getting the trees from the yard to my orchard, about 800 feet away.

I thought about using the hydraulics on a tractor—either by crafting a means for a three-point hitch to lift the pots; by lifting the pots in the bucket of a front-end loader; or by wrestling the trees on to a pallet that could be lifted by a fork lift attachment. I also thought about enlisting the help of several strong people to simply lift the pots into a tractor-pulled trailer.

Subscribe nowSubscribe now

But in the end, none of these approaches were necessary. Instead, I kept things simple with a garden tractor, a small utility trailer, a few blocks of wood, and a long wooden plank.

Wooden Ramp to the Rescue

It couldn’t have gone better. I used the garden tractor to back up the utility trailer to within about 12 feet of the first 25-gallon pot. Then I took a sturdy 12-foot wooden plank and laid it down so one end was in the utility trailer and the other end was right up at the base of the heavy pot, turning the plank into a ramp for the trees. Underneath the plank, I stacked a few blocks of wood to…

Continue reading

5 Purposes For Dried Sunflowers In The Autumn Season

Sunflowers are still vibrant and healthy through August and September, into the early days of autumn. As they start to fade, prepare for ways to use the spent flower heads.

Sunflowers are not just beautiful, but they are beneficial, too. Once the beauty of your sunflowers fades, they can be used as future seeds, food and autumn decorations. Here’s how to harvest sunflower seeds, followed by five ways to prepare sunflowers once they have started to die back.

Harvesting the Seeds

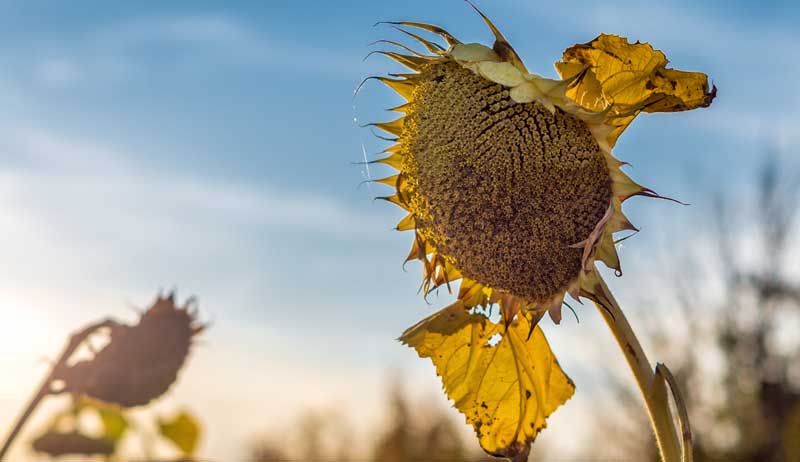
If you plan to use the seeds for replanting or preparing for food, you will need to harvest and remove the seeds by cutting them back from the stalk once they have started to dry out. You’ll know it is time when the back of the flowerhead is turning yellow, most petals have dried up and fallen, and the seeds appear loose. If you want to speed the process up, you can cut bunches and hang them to dry.

De-seeding the sunflower is very simple if the flower is dried enough. Most seeds will be loose and ready to easily come away from the stalk. Firmly rub the seed head over a bucket to catch the falling seeds. Small blooms and other debris will also collect in the bucket.

Once you have completed this process with all your sunflowers, collect a colander or strainer to begin separating the debris. spent sunflowers sunflower seeds autumn fallspent sunflowers sunflower seeds autumn fallgraja/Adobe Stock

Depending on the amount of debris, you will decide if shaking the seeds in the strainer is effective or if you will need to run water over them. If you choose to run water, you will need to make sure they spend adequate time in the drying process so no moisture creates mold and the integrity of the seed is not compromised. 

Subscribe nowSubscribe now

After separation, line a cardboard box or crate with newspaper or paper towels, and spread the seeds evenly in a single layer. They will need to dry a few hours or even overnight depending on how much moisture they have. 

Use Your Sunflower Seeds

Now that the seeds have been harvested, cleaned and dried, you can use them for the following purposes.

Replanting

Place the seeds you plan to replant next year in an airtight container. Label the container and store them in a cool, dark place. 

Roasting

Many people love to flavor and roast sunflower seeds. The large mammoth varieties are best for eating. Once the seeds are cleaned and dried you will want to: 

  1. Boil the seeds in salted water to add flavoring. If you do not like salt, you can move straight to the final step. The ratio should be 1 cup seeds to 1 qt. water to 2 tbsp. salt.
  2. Bring to a boil and simmer for 15 to 20 minutes.
  3. Drain the water from the seeds.
  4. Place the drained seeds in a single layer on…

Continue reading

One Track Mind: Craig Caudill’s Tracking Fundamentals

In my preparedness journey, I’m at a point where I have enough “stuff” and want to ensure that I have enough skills. As a prospective member of my county search-and-rescue (SAR) team and a budding hunter, one skill that I always wanted to learn was tracking. Sure, as a Boy Scout as a kid I learned some absolute basics, such as print identification for species of animals where I grew up, but I never got much further into it than that. While “read a book” is a valid path to prime the pump with many new skills, some things are better to learn in a class setting. So, when I saw that Fieldcraft Survival had not only added a tracking class to its inventory, but had scheduled one near me in Burnet, Texas, I jumped at the chance to get started. I signed up for Craig Caudill’s Tracking Fundamentals course in the Fieldcraft Survival headquarters store in Heber City, Utah, while on the way home from a family road trip.

Photo of the sign for the Reveille Peak Ranch.

Above: The Reveille Peak Ranch has a semi-outdoor classroom area where we initially met. It was nice to see a flag up to start the day.

Fieldcraft is a well-known brand with a wide variety of classes. This was my first time taking a class from them, however, so I was interested to see if it would live up to what I’d heard. I wasn’t disappointed.

The instructor for the class was none other than Craig Caudill, founder of The Nature Reliance School, who had been tapped by FCS to provide this content. Craig has written four books on wilderness survival topics and teaches tracking, among other things, through his school directly as well. So, I loaded up my day-in-the-sticks kit and drove out to Reveille Peak Ranch to start my journey towards becoming a tracker.

Getting Started

The class size was modest — about 10 people. Some people had taken several Fieldcraft Survival classes before; for others, this was their first. A few attendees were prior military service, others have always been civilians. To start out, Craig asked what we all hoped to get out of the class in order to tailor the approach, which I appreciated.

Photo of a footprint in the dust being evaluated as part of Craig Caudill's Tracking Fundamentals class.

Above: The print has been identified and lines have been staked out to help determine key metrics about the track.

To be expected, a lot of people were there driven by their hunting passion. That was part of my purpose, but really tracking people to increase my skill set for SAR was my main driver. Luckily for me, much of the focus would be on man-tracking at first. This is because as people, it would be easier for us to make informed guesses about people tracks. It also doesn’t hurt that, as humans, we could create new human tracks rather than hoping to find animal tracks that may or…

Continue reading here

Homesteading: A Trapper’s Perspective. became a federal trapper.

This will be an instructional/how to article, though I feel the need to set the stage first as to how I acquired the skills I write about and how I implement them regularly. Before attempting anything described in this article, check local laws and regulations.

Introduction

About fifteen years ago, when I was a younger man and had an answer for everything, I overheard some cowboys call their Queensland Healer dogs as “tools, not pets.” As I listened to and watched the cowboys work their dogs, I scoffed at their comments about their animals being tools. I looked at a friend of mine who was with me and said, “They’re comparing their horses and dogs to hammers and screwdrivers.” My friend and I laughed at our irrational comparison, looked once more at the cowboys and walked away. Though I had grown up in a small mountain town, most animals I knew of, be it dogs, cats, chickens, pigs, goats, etc., were all pets to their owners. Before that day, I had never heard of an animal referred to as a tool. Every animal I knew of had a name, a cozy bed, countless toys, and were typically talked to like a child.

It was not until I became an avid hunter, a federal trapper, a “homesteader”, a husband and father that I truly understood, and greatly appreciated, what those cowboys said years ago. I did not grow up in a hunting household, yet, from my earliest memories I yearned to be a hunter, a trapper, a mountain man. Even in my youth, I wanted the freedom to provide for myself, be it through trapping, hunting, fishing, gardening or trading for what I needed. I romanticized the idea of producing my own food and “bringing home the bacon” for a family that didn’t need anything I couldn’t provide or procure.

In my early twenties, I became an avid outdoorsman. I took the skills I acquired from my many years in Boy Scouts and improved on them, challenging myself to shoot better, to set up better camps, and to become a more confident man in the field which in turn made me a better man at home. At first, I had more struggles and failures, but as time went on, and after I was hired as a federal trapper, my skills greatly improved, making me a more successful outdoorsman, tracker, and hunter. I try to learn from my mistakes, failures and even successes to eliminate future unintended issues. As Mark Twain once said, “I have never let schooling interfere with my education.” I have devoted my life to education and learning how to give my family, and me, a better life; a step up from those around me who are content believing what they hear and following the crowd. I have never followed the crowd, hence why I became a trapper in the 21st Century.

As I mentioned, I spent my youth and early adult years in the Boy Scouts. I earned…

Continue reading

Tips to Prepare Your Home for Extreme Weather – reThinkSurvival.com

The weather can be unpredictable at times, and regardless of where you lay down your roots, there will be the potential threat of extreme weather, be it earthquakes, blizzards, flooding, or anything in between. It can be scary to think about, but you can feel much better when you see a storm on the horizon if you plan and prepare your home for the worst. Below are some tips for preparing your house, valuables, and family for extreme weather so you can give your homestead the best chance of success.

Be Proactive With Updates And Repairs

Many preppers and homeowners say that the best way to handle extreme weather is to prepare in advance and anticipate it before it happens. You need to ensure that your home is in tip-top shape and that no vulnerabilities can make an extreme storm even worse for your home and your family.

Several home improvement projects can ensure your safety and comfort during extreme weather, like sealing or replacing your doors and windows if you’re expecting extreme cold or hot temperatures. Seal the windows so your heater and air conditioner aren’t creating unnecessary heat or cold air that’s leaking out. Otherwise, both systems could break down when you need them most.

[Editor’s note: It can’t hurt to have other handy repair items around, like heavy-duty tarps, plywood, nails, screws, etc. just in case a storm damages your home.]

Remember that the outside elements can also leak into your home if your windows and doors aren’t properly sealed. While you’re securing your home against extreme temps, take this time to have a contractor check the insulation in your walls and ensure it’s good enough to keep your home warmer or cooler for longer.

Don’t hesitate to add extra features to your home that can help in the case of an emergency, like a backup generator that can keep your lights on and the refrigerator running in the case of an outage. If your home is subject to flooding, invest in a sump pump to relocate the water away from your property.

[Editor’s note: And be sure you can power that sump pump with a generator or solar or whatever works for you!]

Prepare For Specific Threats

It’s essential that you’re aware of any specific threats that can impact your neck of the woods so you can put the proper protections in place. If your home is in an area prone to flooding and heavy rains, you can install floodwalls out of concrete to keep the water at bay. However, you should also beware of the threat of mud. The bacteria found in mud can be dangerous to humans and livestock and it could take the place of fertile soil, which can be particularly bad if you’re a homesteader who needs good earth to grow your food. You can lessen the possibility of excess mud by laying down mulch to create a barrier or installing drainage to funnel the…

Continue reading

The Honest Truth About 4 More Chicken Breeds (Pt. 2)

Poultry keepers learn a major truth during their years as chicken owners: Some chicken breeds are veritable dreams, while others are absolute nightmares. Before buying any of the chicken breeds my husband, Jae, and I raised on our farm, I did major research. I read books, I talked to poultry-science professors, I visited national breed-club web sites … and despite all this, some birds simply refused to fall in line with their breed descriptions. Talk about frustrating. I can still see Jae turning to me, a puzzled expression on his face, asking questions like “Aren’t these supposed to be nice birds?” and “Aren’t these supposed to lay lots of eggs?”  

The following quartet of cluckers comprises part two (here’s part one) in my honest attempt to share my personal experience with these chicken breeds. It’s my hope that these descriptions of my time spent with each of these chicken breeds will help guide your choices when it comes to backyard flock shopping.  

Araucana  

araucana chicken breeds populararaucana chicken breeds popularOceanProd/Adobe Stock

To make our farm somewhat profitable, we decided to raise heritage chicken breeds that laid a variety of egg colors. When it came to blue eggs, we decided to go with the “original” blue-egg breed, the Araucana.

Many conflicting stories describe the Araucana’s origin. Suffice it to say it developed from one or more fowl found in or brought to South America that shared the Araucana’s tufted, rumpless features. More conflict existed in the description of the Araucana’s disposition. Some of my sources stated the bird was flighty and timid, while others described the breed as friendly and cheerful. Yet others noted the Araucana was active and aggressive.  

Our Black Araucana flock agreed with all of those definitions. As chicks, they were extremely active, dashing around their brooder and hopping on and off their perches. They were also very easy to frighten. Just reaching in to swap out their waterer or feeder would cause a cacaphony of cheeps as the peeps dashed frantically away to hide from The Hand.

Oddly enough—and this occurred with every generation we raised—it was as if a switch was flipped at about 5 or 6 weeks of age. Now, instead of fleeing from my hand, the juveniles were more likely to hop onto my hand and just sit there contentedly. My sons took to watching TV with an Araucana pullet or cockerel seated on a rag on their laps. As adults, the girls’ attention shifted to the roosters, whom they followed devotedly around the run.

Subscribe nowSubscribe now

The hens were not afraid of us, however. I got the distinct feeling they tolerated us. The boys, however, still trotted over for belly rubs and mealworm treats, regardless of their age.  

Both the male and female Araucanas were excellent foragers. However, due to their exhorbitant value—we paid $50 each for…

Continue reading

Quail Can Be Perfect Poultry For Those Without Land

One decade ago, Jenny and Will Ledlow bought 6 acres in central Oklahoma, where Jenny dove into hobby farming. Raising a vegetable garden, pigs, guineas, rabbits, chickens, ducks, geese and quail, Jenny provides most of the family meals and a lot of fun. Plus, through social media and farmer’s markets, she sells what the family doesn’t use. 

“I’m not a quail expert,” Jenny says. “But I’ve had poultry since I was a kid. I learned quail care online, reading books and through years of experience. After reading about quail, I decided to try raising them. In 2014, I hatched around 20 quail eggs that I bought online. I chose coturnix quail because they are fast growing, very productive and fairly easy to care for.

“Quail are not a big investment, and they can provide eggs and meat for people without land. Plus they are quiet and small.” 

Quail-Raising Basics

During the first four weeks, Jenny feeds her quail game bird starter. Then she switches to game bird feed, kale, herbs, lettuce, cucumbers, corn on the cob, mealworms, berries and insects. 

For living quarters, Jenny says, “Housing needs to be safe and easy to clean. Most people who raise quail for eggs use stacked cages with roll-out spots for eggs. Metal, wood and wire are common materials used. I move my housing according to the weather. I like movable pens that are about 4 by 5 feet because it is easy to move them outdoors when it’s nice and onto a clean area so I can clean the previous place where they were. It also lets me add things for them to do such as sand boxes, clumps of grass and dirt, and places to hide.coturnix quailcoturnix quailJenny Ledlow

“I protect my quail from predators using small wire on the pens or hardware cloth. Or I move them indoors. I never allow them to free range because coturnix quail are not native to Oklahoma. Also, they would be eaten by cats or other predators. I’ve seen them raised with chickens, but I haven’t tried it. I house them separately from other birds.” 

Subscribe nowSubscribe now

In winter, Jenny’s quail are in sheds, chicken coops and Will’s shop. In summer, Jenny keeps the quail in the shade and monitors for fresh water. One summer she kept them in the garage with a window air conditioning unit. 

The Value of Quail Eggs

Coturnix begin laying tiny, spotted eggs at 6 weeks of age. Jenny says they lay any time during the day and during all seasons, including winter (depending on the quails’ ages and housing). 

“The chicks hatch in 18 days but can hatch earlier or later,” Jenny says. “They are similar to baby chickens, but they need food, water and bedding changes a lot more often. There are special food and water…

Continue reading here

Establishing Your Sales Channels As A Flower Farmer

The flower farming movement has been generating more and more momentum. And with that momentum, more farmers, market gardeners and entrepreneurs are opening up their flower farms for business. With so many new flower farmers entering the market, it can feel tough to establish yourself among the competition.

Flower farms are setting themselves apart with branding and marketing. But perhaps the most critical distinction a flower farmer can make is their choice in sales channels. Not all flower farmers target the same markets for their business, and here are just a few of the most popular and successful sales niches in the flower farming industry.

Cut Flower U-Pick

Flower farms across the country are opening their doors to guests. Agritourism is nothing new, but cut-flower u picks are becoming an increasingly popular choice. Some farms choose to focus on single varieties, such as mass plantings of tulips or sunflowers. Other farms are taking a more comprehensive approach and planting large varieties of flowers, allowing guests to pick and design their own flower bouquets.

Many of these farms also charge photographers for photo sessions and will often host special events and workshops  on the farm. These flower farm u-picks can greatly increase profits while also decreasing labor costs, as the end customer is also cutting the  flowers themselves.

Farmers Market

This is the traditional small-farmers sales outlet, but farmers markets can be excellent places to build a customer base for your flowers. Consider growing more spring crops and entering the farmers market earlier in the season, when there is less competition from other cut flower farmers.

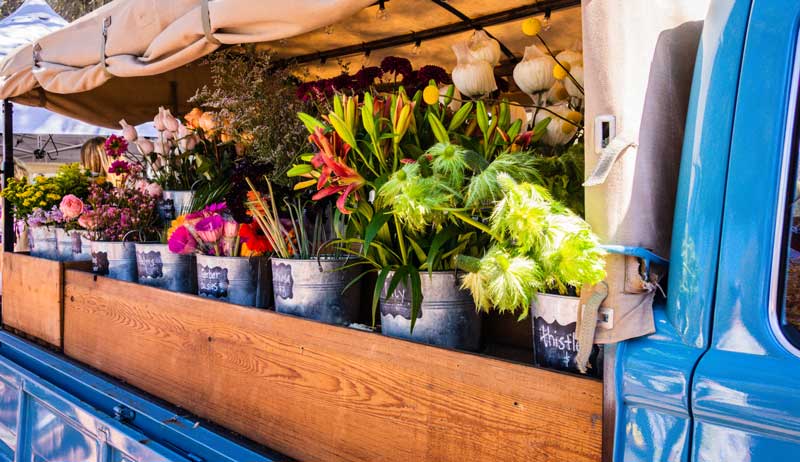
A combination of mixed bouquets, a few arrangements and some single stem (buy by the stem) options would make a nice display and offer your customers variety.

Subscribe nowSubscribe now

Flower CSA

Flowers CSAs, Community Supported Agriculture, are increasing in popularity with customers enjoying the “earthy” and “wildflower” aesthetic touch that fresh cut flowers bring to their homes. CSAs are basically selling a subscription service from the farm.

Supporters buy in at the beginning of the season with a lump sum payment. Then they receive a weekly, biweekly or sometimes monthly bouquet of flowers. These can be wonderful sales channels for flower farms as they provide investment capital at the beginning of the season.

CSAs do have some drawbacks and can lock you into fulfilling large volumes of bouquets weekly all season. While that may sound great, being paid for all of these bouquets upfront can cause some cashflow issues throughout the season.

Florist Sales

Florist sales can be an excellent sales channel for a flower farmer. Florists can take large volumes of flowers all at once, and they do not require designing time or bouquet creation. You simply harvest, process, and send the flowers to the florist. Retail florists often will take regular weekly orders, and event florists may have standing orders as well as large volume special request orders.

Florist sales may seem most intimidating to begin…

Continue reading

Warped & Weird Flowers? Could Be Aster Yellows Disease

Between more extreme weather than usual and an onslaught of head-clipping weevils, my butterfly garden took a beating this season. Usually I don’t have to do much to keep my milkweed, black-eyed Susans and other native perennials looking their best. But within a particularly dense planting of purple coneflowers, things went off the rails when aster yellows disease moved in.

The large, purple flower heads I expected to see were replaced with blooms right out of a Dr. Seuss book. Green, leafy “petals” ringed bright green cones. Weirder still, in some spots the leaf-like petals were replaced with additional flower stalks—also sickly green and badly deformed.

At first I thought it was just some genetic anomaly. Looking into it further, I realized the news was much worse—a classic case of aster yellows disease.

Aster What?

Caused by a phytoplasma—a special type of bacterial plant pathogen—aster yellows disease is transmitted by leafhoppers. According to John Bonkowski, a plant disease diagnostician at Purdue University’s Plant and Pest Diagnostic Laboratory, “What typically occurs is the phytoplasma will be within the gut of the leafhopper. So, while feeding, a leafhopper pokes its piercing, sucking mouthpart into the leaf and sucks out some of the [the leaf’s] contents. They sometimes also push out saliva, and the phytoplasma comes out when they do that. It goes into the plant.”

A kind of parasite, phytoplasmas are bacteria that lack cell walls. As such, they cannot live outside on their own. “They need to be inside the host,” Bonkowski says. “That’s why they’re being moved around by the insects.”

Echinacea plants are among the most commonly affected by aster yellows disease. However, marigolds, zinnias, daisies and chrysanthemums are some other susceptible targets.

Subscribe nowSubscribe now

Disease Symptoms

Once an infected leafhopper transmits the disease-causing phytoplasma to a plant, the entire plant is systemically affected. “It’s going to be throughout the plant,” Bonkowski says. “The phytoplasma can affect the hormone balance in the plant, which is why you end up seeing these very particular symptoms in coneflower and zinnias and these other aster plants.”

“Flower parts will start developing leaves,” he adds. “So, in the case of echinacea, you have the cone itself—the spiky part—and it actually will start developing bunches of leaves.”

In general, plant growth may be very stunted and small. “There might be more stems compared to what a normal plant would produce,” Bonkowski says. “You’ll have these offshoots that are very green and maybe smaller than you might expect on a typical flower. The big thing is that the hormone balance is disrupted, and you have these odd plant growths because of it.”

The Fix

When it comes to eradicating aster yellows in affected plants, there’s really no good treatment. What’s more, simply pruning them down to the ground isn’t enough. “The aster yellows phytoplasma will not survive in the debris of infected plants. But it can survive in the crown and roots of infected…

Continue reading