Survival Archery: The Ultimate Skill for a Post-Apocalyptic World?

Survival Archery Practice

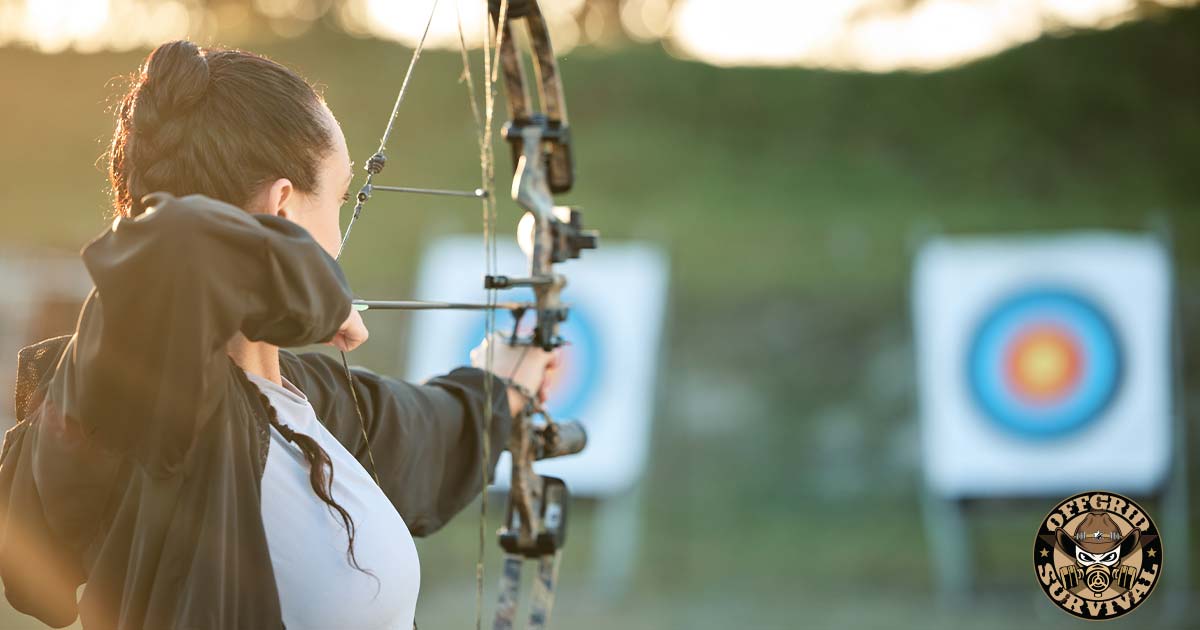
In a world where modern conveniences can quickly disappear in the blink of an eye, the ability to adapt and rely on your survival skills is becoming more apparent by the day. One such skill, often overlooked in favor of firearms, is archery. In a total all-out collapse situation, archery is a skill that can help you survive no matter how harsh conditions may become.

Picture a world plunged into chaos – a world where the comforts of modern civilization are mere memories. In this new landscape, food is scarce, threats lurk everywhere, and the ability to protect oneself and secure food becomes the ultimate currency.

It’s not a dystopian fantasy; it’s a scenario rooted in history and one that could be the future we are heading towards, thanks to the elites who wish to crash everything into the ground in some great reset fantasy. From natural disasters to societal collapse, numerous events could lead to a world where survival skills mean the difference between life and death.

But why should you learn to shoot a bow and arrow when firearms are readily available? Hey, no one is saying to give up your guns, but we like having options and having as many backups as possible. So here are five compelling survival-related reasons why mastering archery is worth your effort.

1. It helps Provide a Food Source

In times of crisis, securing food may become a challenging task. A bow is an invaluable tool for hunting game, including everything from deer to smaller prey like rabbits and birds – you can even retrofit your bow for fishing as well. Its stealth factor and ability to reclaim and use your arrows are what sets it apart from firearms. The quiet operation of a bow allows for stealthy hunting, increasing your chances of success without giving away your position.

The ability to hunt game silently could be a game-changer. Additionally, as we pointed out above, bows can be used for bow fishing, a versatile hunting method to catch fish silently.

2. Portability

Survival scenarios often demand mobility and adaptability. Traditional bows, mainly takedown bows, excel at this task. Takedown bows can be disassembled into compact pieces, making them easy to transport even when you need to travel light. A takedown bow can be your trusted survival companion when space and weight are at a premium.

3. Low Cost

In these turbulent times, budget-conscious choices are essential. You can acquire a reliable takedown bow or compound bow without breaking the bank. The affordability extends to ammunition – arrows are cost-effective and, with practice, reusable. Unlike firearms, where ammunition can be scarce, archers can even craft their arrows using readily available materials.

4. Less Paperwork and Less Strict Laws

Owning a firearm often comes with a maze of regulations and paperwork. Archery, in contrast, involves fewer legal hurdles. While there are some rules to follow, they are generally less restrictive than those governing firearms. Archery offers a more straightforward path to self-reliance.

5. Improved Fitness Levels

Survival situations demand physical fitness….

Continue reading here

Cooksey Farms Is About Gardening With Gratitude

Alison Cooksey of the Cooksey Farms social media account proudly calls her Bay Area-based hobby farm a “trial and error” project. In practice, this means taking bold decisions in the garden and paying attention to how the natural results unfold.

“I always knew I wanted to garden because I grew up watching my dad garden. I always thought it was neat how he essentially created a mini-farm in our backyard,” recalls Cooksey of her initial interest in growing produce. “I was inspired by seeing how proud he was, coming inside with things he grew to cook for dinner. Once I finally got my own home, I couldn’t wait to start my own garden.”

We spoke to Cooksey about the gratifying nature of gardening and planting peppers in December. We also got the scoop on a little something called potato cucumbers.

Embracing Experimentation

When it comes to embracing experimentation in the garden, Cooksey points to planting pepper seeds in December as a risk that paid off.

“I felt that it was too early to start them, as last year I didn’t start the seeds until March,” explains Cooksey, “but my peppers barely produced by the time it got too cold. Someone I talked to who lives in a warmer climate than I do said they start their pepper seeds in December. So I decided I’d try it and see what happened.”

Reaping the benefits of planting boldly, Cooksey says the peppers “have done exceptionally well this year. They produced early and have been very prolific!”

Playing with Seed Starting

Building on the experimental streak, Cooksey says that playing around with seed starting has also proven fruitful.

“I’ve found that I have had the best success starting seeds hydroponically. The seedlings get the right amount of water and light, and it takes a lot of the babysitting of seedlings away. All of my hydroponic starts were some of the strongest and healthiest plants I’ve ever had!”

Peppers, Tomatoes & Cucumbers

Looking over this year’s bounty from the garden, Cooksey says peppers, tomatoes and cucumbers emerged as leading success stories. “It’s been nice to be able to have enough to eat and also share with friends and family for once,” says Cooksey.

“As far as incorporating my produce into cooking,” she continues, “I’ve been adding peppers and tomatoes to almost every dish. Sometimes it feels like I’m on the cooking show Chopped. I look at what I have in the garden and in the pantry, and I see what I can make!”

Get to Know Potato Cucumbers

If you take a moment to enjoy the Cooksey Farms Instagram account, you’ll notice the presence of some eye-catching potato cucumbers. “The potato cucumbers are definitely unique,” says Cooksey. “They are a smaller, bushier variety, but sadly they haven’t been very prolific for me. But that could be due to a few factors. I put my plant in a grow bag, so next year I’ll try it in a larger container or in a raised bed and see…

Continue reading

Recipe: Welcome Fall & Embrace Nature With Some Apple Tea

After five consecutive days above 90 degrees, temperatures (as I write this) have plummeted into the 60’s. It’s felt incredible. People joyfully pulled out their sweaters and jeans and opened their windows.

The cool temperatures get everyone in the mood for cooking and “soup season.” My daughter began pulling out our fall/Halloween decor, and we even baked a batch of apple crisp. Apples are as synonymous with fall in Minnesota as pumpkins.

Being that we are midway through September already, I thought it would be a great time to share a recipe from a new book that my publisher sent me called The Green Witch’s Guide to Magical Plants and Flowers, written by Chris Young and Susan Ottaviano.

Have you heard the term, “Green Witch” over the past few years? The definition of a green witch is someone that embraces nature and intentionally works toward living in harmony with the earth and humanity. Green witches believe that their “connection to the earth and the universe allows them to draw great power from creating love, health, peace, blessings and harmony in their world.”

Magical herbalism is the central practice of a green witch. The 2 Green Witches that authored this book seek to encourage readers to transform everyday flowers, fruits and plants from the garden into salts, herbal infusions, soaps, sachets, tinctures and more.

I tried one of the recipes in the book this week, as I was craving tea with these cooler temps. I’d say this apple tea definitely worth making again.

Subscribe nowSubscribe now

Serves: 2

Ingredients

  • 2 green tea bags
  • 2 sticks of cinnamon
  • 3 whole cloves
  • 4 whole allspice berries
  • 1 cup unsweetened organic apple juice or apple cider
  • 1 green organic apple, sliced
  • Maple syrup or organic sugar, to taste

Instructions

In a saucepan, bring 2 cups of water to a boil. Add tea bags, cinnamon, cloves and allspice to the pan. Remove from heat. Cover and let steep for 3 minutes.

Discard tea bags and spices. Stir in apple juice (or cider) and heat through.

Always remember that spoons are a kind of wand. You can use them while you cook to direct your energy and intentions to empower whatever you are preparing.

Serve tea with the green apple slices and sweetener of choice.

This recipe has been shared from The Green Witch’s Guide to Magical Plants and Flowers with permission from Skyhorse Publishing, Inc.

Continue reading

Six old knives I’ll never sell – Survival Common Sense Blog

I review knives, and must barter, trade or sell some to pay the bills and acquire more knives to review.

A reader asked if there was one particular knife I wouldn’t sell. Here are six.

By Leon Pantenburg

Some physical items become touchstones to great memories. Some knives do that for me. For that reason, I have several worn, semi-grungy knives that couldn’t be replaced and that will never be sold.

Mora 840 Companion: Several years ago, I bought several Mora knives to field test as potential knives for Boy Scout Troop 18 in Bend, Oregon. A scout nearly severed his finger at camp the previous summer, when a combination of stupid knife handling and a faulty lock on a folder created a serious accident.

There was a dual purpose in checking out Moras – I wanted to see if there was a way to use the blade for flint and steel firemaking, and we needed a quality, rigid blade for the scouts to use. (Sheath knives ARE NOT banned in the scouts, but some districts and/or scoutmasters do ban them. Here is why this is a bad idea.)

So after trying out several different styles and brands of blades, and some use and downright abuse, the troop settled on the Mora 840 Companion. (Read the review.) We got a great deal on 40, from an Eagle Scout who owns a knife store, and were able to sell them to the scouts for $8 each. A few years later we ordered 50 more, and the scout price was $10 each. The scouts have used these knives hard, as only an enthusiastic kid can, and there has never been a failure in any of the Moras.

I used the hell out of my original Mora. It was the knife I took along on camping and canoe trips and loaned out to beginners. Basically, it was disposable – if the Companion got lost in a creek of deep snow, I could get another for under $20. A scoutmaster friend of mine also got a 840 as a utility knife. A physician, he could easily afford a better knife, but his $8 Mora has been taken and used on moose, caribou, elk, deer and hog hunts.

So these thing creep up on you. Today, my original Mora is showing some wear around the edges. But whenever I use it, I recall the many, many scout campouts, the kids I loaned it to and good times associated with the outdoors. So it’s not for sale.

Tinker: My buddy and fellow Boy Scout volunteer Jim Grenfell were discussing/debating what was the best pocket knife. I made a persuasive pitch for the three blade Stockman pattern knives I have been carrying for decades.

Swiss Army Tinker, best pocket knife, best every day carry knife

The Swiss Army Tinker is an inexpensive knife that can handle a variety of tasks.

Jim argued…

Continue reading here

Putting Your Garden To Sleep For The Winter

You can find many reasons to put your garden to sleep for the winter. Remember that a natural ecosystem will necessarily have preparation in order to go into the long cold winters that we experience throughout most of North America.

There are many important ways that we can maximize ecosystem services when putting our garden to rest. These can be broken down into various strategies and can also paired with other typical market garden and landscape management techniques.

Let’s explore some of the top choices for preparing your garden for winter.

Cover Cropping

Cover cropping is your ally going into the winter because it protects the soil surface not only in the fall when you may have heavy rains, but also throughout the winter. Cover crops can keep soil life buffered from the extreme temperatures of the cold winter months.

It also protects the soil in the spring, when there is not only a lot of runoff from snow melt but also heavy rains, which will erode unprotected soil, causing you to lose not only the grains of your soil but also the nutrients.

Cover cropping has additional benefits, too, scavenging nutrients in the fall.  This means these crops take up various soluble nutrients, such as nitrogen available in the soil after your crop is finished, and holds them in an insoluble form in the form of organic matter that is living and growing.

Subscribe nowSubscribe now

Cover crops can also provide weed suppression benefits by preventing the germination of weeds by covering them over with a canopy—especially perennial weeds that may germinate in the fall and annual weeds that may germinate in the spring. This last benefit is best achieved by using an overwintered cover crop such as winter rye, which has the added effect of actually suppressing weed seed germination by an allele pathic chemical reaction in the soil.

The addition of cover crops in the spring through flail mowing and incorporation will serve as a green manure, only further adding to their overall ecosystem services for your garden. Cover cropping is one of the top choices for putting your garden to rest in the winter.

Cover cropping is easy to do, too. You can simply remove your crop debris and broadcast or re-prepare by lightly tilling the beds and seeding. Or you can undersow with cover crops like clover and allow them to germinate in the canopy of the crop, such as squash, just prior to harvest.

However you slice it, cover crops are a multi-faceted way of keeping your garden in good shape in the fall winter and spring.

Crop Cover Cropping

Another type of cover cropping that is often overlooked is crop cover cropping. This is the process of leaving crop debris in your garden fields or beds in order to benefit from their protective services over the fall and winter. In the spring this would mean allowing late crops of lettuce to bolt and go in flower,…

Continue reading

SurvivalBlog Recipe of the Week: Pam’s Pumpkin Soup.

The following recipe for Pam’s Pumpkin Soup is from SurvivalBlog reader Pam C.

Ingredients
  • 2 small sweet pumpkins — 2 pumpkins yield about 2 1/4 cups of pumpkin puree
  • 1 Tbsp olive oil
  • 2 medium shallots, diced — 2 shallots yield ~1/4 cup)
  • 3 cloves garlic, minced — 3 cloves yield ~1 1/2 Tbsp)
  • 2 cups vegetable broth (home-made or store-bought)
  • 1 cup canned light coconut milk
  • 2 Tbsp maple syrup or honey
  • 1/4 tsp salt
  • 1/4 tsp black pepper
  • 1/4 tsp cinnamon
  • 1/4 tsp nutmeg
  • 1/4 tsp black pepper
Directions
  1. Preheat oven to 350 degrees F.
  2. Line a baking sheet with parchment paper.
  3. Using a sharp knife, cut off the tops of the pumpkins and then halve them.
  4. Use a sharp spoon to scrape out all of the seeds and strings. You can save the seeds for planting or roasting.
  5. Brush the pumpkin flesh with oil and place face down on the baking sheet.
  6. Bake for 45-50 minutes or until a fork easily pierces the skin.
  7. Remove from the oven, let cool for 10 minutes, then peel away the skin and set pumpkin aside.
  8. To a large saucepan over medium heat add olive oil, shallot, and garlic.
  9. Cook for 2-3 minutes, or until slightly browned and translucent. Turn down the heat if it is cooking too quickly.
  10. Add the remaining ingredients, including the pumpkin, and bring to a simmer.
  11. Transfer the soup mixture to a blender or use an immersion blender to puree the soup.
  12. Pour mixture back into your pot.
  13. Continue cooking over medium-low heat for 5-10 minutes and taste and adjust seasonings as needed.
SERVING

This serves 3-to-4 adults.

Optionally, it can be topped with chopped kale.

STORAGE

Leftover soup keeps well in the fridge for up to a few days and in the freezer for up to a month or more.

Do you have a well-tested recipe that would be of interest to SurvivalBlog readers? In this weekly recipe column, we place emphasis on recipes that use long-term storage foods, recipes for wild game, dutch oven recipes, slow cooker recipes, and any recipes that use home garden produce. If you have any favorite recipes, then please send them via e-mail. Thanks!

Continue reading

US Economy Faces Crisis as Liquidity Dries Up and Household Debt Soars Crosses $17 Trillion.

Rising auto loan delinquencies, soaring national debt, and household liquidity predicted to vanish by May 2024. As household incomes witness the steepest drop since 2010 and crude oil prices skyrocket, the U.S is bracing for harsh economic times.

As the United States contends with an unprecedented rise in economic woes, preparing for what lies ahead is not only prudent but essential to your survival. Traditionally seen as the backbone of the American economy, the middle class is becoming increasingly synonymous with “the impoverished class,” signaling a critical moment in US history that demands immediate and substantial intervention.

Americans have lost over $7,100 in spending power since January 2021. 

While the average American family’s weekly paycheck is about $230 larger today, it buys about $100 less compared to when President Biden took office. Even more alarming, is according to a report by the Heritage Foundation, inflation during Biden’s reign has caused the average American family to lose around $7,100 in buying power.

Under Biden, prices have risen so much faster than wages that the average family has lost $5,800 in real annual income. That loss is thanks to the ‘hidden’ tax of inflation, caused by the Biden administration and congressional Democrats’ policies. Higher interest rates are now costing the typical family another $1,300 annually. Combined with a lower real income, this effectively costs families a total of $7,100 in annual income under Biden.

A hard look at our fiscal reality presents a pretty shitty picture, with the US national debt witnessing an alarming surge — up a staggering $1.5 trillion since the recent debt ceiling crisis. In the last three months alone, the government has added an average of $500 billion per month to the national debt, translating to a 54% increase in the last half-decade. Yet, the government seems to be on a relentless spending spree, with the CBO anticipating a $2 trillion deficit in the coming year as year-to-date interest expenses cross the $800 billion mark.

Adding to economic problems is the surge in crude oil prices, officially breaching the $90 mark for the first time since November 2022 — a 35% increase in just three months. This upward trend has resulted in an alarming depletion of the Strategic Petroleum Reserves (SPR), leaving the US with less than 46 days of supply left in its reserves. The nation’s economic heartbeat seems to be fading with each passing day as excess household liquidity, currently standing at $1.4 trillion, is projected to completely dry up by May 2024, evaporating at a rate of $100 billion per month.

It’s hitting almost every economic sector!

Currently, the auto industry is smack dab in the middle of some real turmoil, with delinquency rates on auto loans reaching heights unseen since 2008, nearly doubling since the Federal Reserve initiated rate hikes in March 2022. The recent quarter saw a jump to 7.3%, a prelude to Moody’s prediction of a 10% delinquency rate by 2024. This has added to the crushing blow being felt by American households; the steady rise in used car interest…

Continue reading

Recipe of the Week: The Easiest Jam or Syrup. A delicious fruit syrup.

The following recipe for Jam or Syrup is from SurvivalBlog reader Mrs. Alaska. She writes:

Fruit jams and syrups are the taste of summer in a jar.

Some jam recipes can sound intimidating, but with only two ingredients, you can make jam.  If it does not gel, then you have fruit syrup.  What is the downside? Give it a try.

Jam requires a bit of patience and attention (low boiling and stirring over 30 minutes or so) and two, three, or four ingredients depending on the fruit.  The easiest fruits have natural pectin ( a jelly-like substance)  and acid (sourness) and just require sugar. That’s it!  Examples of easy, common, jam-making fruit include all citrus, grapes, blackberries, black currants, and, believe it or not, tart apples.      Slightly under-ripe, (tart) fruits are almost foolproof. Other fruits, like stone fruits (peaches, apricots) and strawberries need extra acid (usually lemon juice) and purchased packages of pectin (in the baking aisle).  They are NOT 2 ingredient jams.

SO:  The easiest jam for first-time jam makers is from tart, high-pectin fruits.  Try those above or research the term to find the fruits you favor. (Search “high pectin fruit”)

The first jam I make each year is with haskaps, which are a berry from Japan that I grow in Alaska.  Its taste is between a blackberry and a concord grape.  It has a blue skin and red interior, in a knobby shape like the end of one’s pinkie finger.  This berry also has a high pectin content, which is the jelly-like substance one sees in all citrus, grapes, and some berries.

I dump a gallon of berries into a big pot with ½ a gallon of sugar, and stir often over a medium low flame until the mixture liquefies and thickens.  Many recipes recommend a 1:1 ratio of fruit to sweet, which may make sense with citrus and tart apples but this is too sweet for haskaps and my taste in general.  I encourage new jammers to start with an existing recipe or cut back on the sugar and then taste and adjust to your preference.

Turning fruit juice into jam involves a chemical reaction of the sugar and acid molecules to bind and thicken.  High amounts of sugar or purchased pectin is an easy way to accomplish this, but for my taste, I prefer to simply boil my batch longer, thereby concentrating the flavor as some of the liquid steams off.  How long?  About 30 minutes, depending on how much liquid is in your fruit of choice.  My fruit mixture sheds water, dropping about two inches deeper than its upper line.   You will know that that your fruit liquid will gel when the liquid looks glossy.  First timers: You can measure temperature.  You want about 110 degrees.

BEWARE:  As the liquid heats, it will foam up.  If you have too small a pot, then you will have a hot, sticky mess on your hands.  So make sure that you have about  5 inches…

Continue reading

Watering Your Garden, when There’s not Much Water

One of the biggest incongruencies I’ve seen about prepping, is the problem with watering a garden. That may not seem like much of a big deal for you; as you’ve probably never been without water. But I live in an arid part of the country, where water usage is something we have to pay attention to. We can go weeks at a time without rain, meaning that if we’re caught in a situation where we don’t have municipal water and we have to live off our stored water and what we can get from rainwater harvesting, we’re going to have to be very careful with our water consumption.

I’ve never agreed with the “gallon of water per person, per day” that people quote. That’s just what’s needed for drinking and cooking. When we add in a minimal amount of bathing, cleaning and washing clothes, it can grow much higher. Put gardening on top of that and we could be in real trouble.

Part of the problem is that we don’t really know how much water we use for gardening. About half the average family’s water usage is watering the lawn, but that’s not what we’re talking about. We’re only talking about watering the garden. Even that can take a lot of water. If you have a 100 sq. ft. garden and are giving it one inch of water per week, that works out to 62.5 gallons of water. On top of that, if you live in a hot climate, like I do, and only give your garden one inch of water per week, everything will die.

This Device Easily Turns Air Into Water!

Let’s refine that a bit more. No family is going to be able to live on the food you can raise in a 100 sq. ft. garden. You need 150 to 200 sq. ft. per person, per year, or 600 to 800 sq. ft. for a family of four. Based on the numbers above, an 800 sq. ft. garden will need roughly 500 gallons of water per week. If you live in the South, you’d better count on twice that.

Where is all that water going to come from?

It’s certainly not going to be able to come from whatever amount of water you have stockpiled. Unless you have a well or a stream going through your property, you’re going to have to get that water from rainwater capture.

But wait a minute. Is there any way that we can keep that garden alive, without having to use that much water? Yes, there is. The one inch of water per week that is recommended for watering a garden is with the idea that the entire surface of the garden needs to be covered with one inch of water. Fortunately for us, there have been methods developed, which will allow us to water our plants, with much less water, saving 70 to 80 percent of those 500 gallons per week mentioned above.

Soaker Hoses

The first…

Continue reading

Review: Purely Alpaca Outdoor Adventure Socks, by Thomas Christianson

Purely Alpaca Outdoor Adventure Socks are made with a warm, comfortable, moisture-wicking, odor-resistent blend of alpaca, microfiber, nylon, and lycra. They are machine washable and tumble dryable.

They are priced at $25.95 a pair at the time of this writing from purelyalpaca.com. You may want to think about trying a pair.

The Backstory

My buddy from high school and I have been through a lot together. I was with him when he broke his arm. He was with me when I ricocheted an arrow off a snowman and into the side of my parent’s above-ground swimming pool. I was the best man at his wedding. He was the best man at my wedding. He had a daughter on my birthday. I had a daughter on his birthday. We have quite a bit of shared experience.

A few years ago, my friend began telling me about his wonderful alpaca socks. He said that they were so breathable that he could wear them summer or winter, that they were so odor-resistant that he could wear them a week at a time without laundering, and that they were by far the most comfortable socks that he had ever owned.

I was intrigued, because I love a good pair of socks. I began keeping my eyes open for an opportunity to give a pair of alpaca socks a try.

Recently, I ran across purelyalpaca.com online. Their outdoor adventure socks looked very interesting. So I sent them a message, asking if I could try out a pair. They were kind enough to agree. About a week later, a package arrived in the mail.

Opening the Package

The socks arrived in a USPS First Class Package. The return address was Purely Alpaca, 1444 Main St. #308, Ramona, CA 92065.

The labeling on the socks indicated that they are made in the USA. It also stated, “Alpaca is an excellent choice for warm docks due to its strength and hollow insulating core. These socks are made with a terry inner design for added warmth and comfort.” The wholesaler was identified as Choice Alpaca Footwear, PO Box 8598, La Jolla, CA 92038.

First Impressions

The outside of the socks felt very smooth and soft, and the terry design on the inside was quite cushiony. I pulled the socks on. They were very soft, warm, and breathable. I had the impression that they would make an excellent pair of slippers.

At first, I thought they might be a little thick for everyday wear. But as I wore them every day for a week, I found them to be extremely comfortable under a variety of shoes and boots during a variety of weather conditions. They remained odor-free throughout a full week of wear, washed up nicely in the laundry, and were soon ready for another week of wear.


When I put them on for a second week of wear, I was again impressed by how comfortable they are.

I…

Continue reading