So, Is It Illegal To Collect Rainwater in Arkansas?

Water is one of the most precious resources we have, and it is doubly precious in the middle of any situation where our usual water supplies are cut off or contaminated.

One of the very best things you can do to ensure your continued access to water, no matter what, is to install a rain catching system on your property.

flag of Arkansas

People have been doing it for thousands and thousands of years, but some states actually tightly regulate the practice.

How about Arkansas? Is it illegal to collect rainwater in Arkansas?

No, it isn’t illegal to collect rainwater in Arkansas but the practice is tightly controlled and regulated. The State Board of Health dictates that any collected rainwater is only used for non-potable purposes, and all systems must comply with the Arkansas Plumbing Code.

This is something of a major disappointment if you live in Arkansas. Compared to every other state in the south, Arkansas has significantly more regulations and oversight on the design, installation and use of rainwater collection systems.

But, it’s just something you’ll have to deal with if you want to set up your own in the state. Keep reading and I’ll tell you everything else you need to know.

Is Collection of Rainwater Illegal at the State Level in Arkansas?

No, the collection of rainwater isn’t illegal at the state level in Arkansas but it is tightly controlled through the State Board of Health. See 17-38-201.

The board of Health has been empowered by the legislature to set standards for the use of rainwater collection systems by citizens.

In short, every rainwater collection system in the state must comply with the edicts of the State Board of Health.

That means they must all be designed by professional engineers and fully comply with the codes laid down and the Arkansas Plumbing Code.

Is Collection of Rainwater Illegal at the County Level?

No, my knowledge there is no county in Arkansas that makes the collection of rainwater outright illegal.

That being said, individual counties and city governments might institute even stricter laws and ordinances concerning the use of rain water catching systems.

It’s bad enough having to comply with the water state laws, but now you must double check and ensure that your local authorities aren’t going to make the process even harder.

I would expect permitting processes and inspections as a matter of course, particularly in more populous areas.

Under What Conditions Can Citizens Collect Rainwater in Arkansas?

Citizens of Arkansas can collect as much water as they want with their systems whenever it is raining, and there is no state statute determining times or seasons when rainwater collection is off-limits or restricted.

But with that said, it isn’t out of the question that local or state authorities might issue restrictions or total stoppages on the practice depending on any emergencies that have arisen.

Especially in the case of drought, groundwater or below ground water source…

Continue reading

A Few Expert Tips On Harvesting More Produce And Longer Storage

There is a unique satisfaction in cultivating and preserving our own crops, serving as a reminder that the convenience of supermarkets falls short of its promises. After dedicating our time and effort throughout spring and summer to grow our own food, it would be a shame not to fully utilize the harvest.

However, handling the abundance of summer crops can be quite challenging as they all seem to ripen simultaneously.

During the peak of summer, it is advisable to inspect garden plants every other day to identify what needs to be harvested. Remember that the smaller versions of fully ripe fruits and vegetables often offer the best taste and nutrition.

Once you gather the bounty, choose a storage and preservation method that suits your time constraints. If you find yourself with a free Saturday morning after harvesting, you might consider trying your hand at smoking chipotles or making pickles and chutney. On a busy weeknight, though, it may be more practical to preserve the produce by freezing it. And, of course, relish in the pleasure of consuming as many succulent, ripe, garden-fresh gems packed with optimal nutrition as possible—while they are still available!

Tomatoes

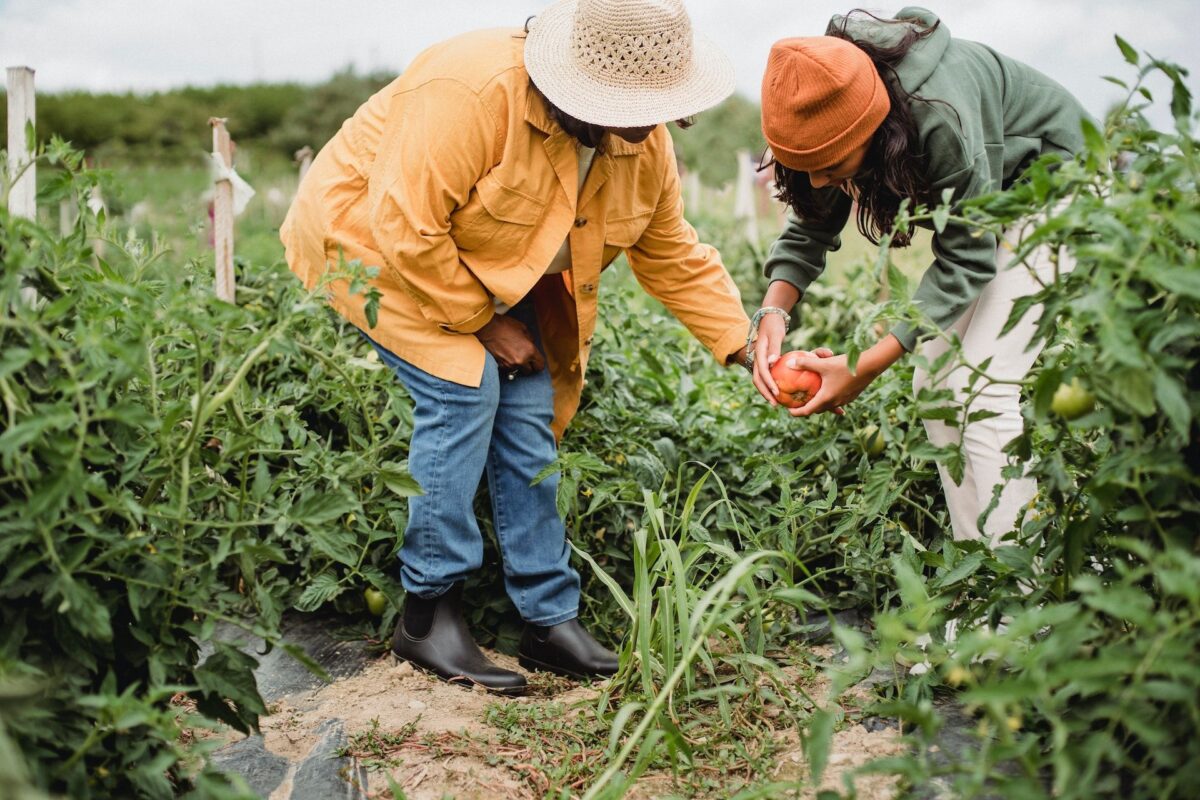
HARVESTING: Different tomato varieties ripen at different rates. Some types ripen all at once, while others, like cherry tomatoes, continue to bear fruit throughout the season. Check your plants every few days or daily during the peak of harvest, picking the ripe ones as you spot them. Leaving a short stem attached to the tomatoes will help extend their freshness.

STORE: Fresh tomatoes are best stored at room temperature and should never be refrigerated. Keep them away from other fruits, such as bananas, as they can hasten ripening. Tomatoes can last for a few days under proper storage conditions. If you come across any tomatoes with damaged skin, it’s best to consume them promptly.

PRESERVE: Small tomatoes can be frozen whole by placing them on a parchment paper-lined tray. Once frozen solid, transfer them to freezer containers, removing excess air, and freeze for up to a year. These tomatoes can be cooked directly from frozen.

Another delightful preservation method is oven-roasting tomatoes with herbs, olive oil, salt, and pepper until they become completely soft. Allow them to cool, then scoop the mixture into jars and store in the freezer for up to a year. This roasted tomato base is perfect for sauces, soups, chicken cacciatore, chili, and various other dishes.

To dry tomatoes, cut them in half and place them skin-side down on fine-meshed wire racks set on trays. Sprinkle a bit of salt over the tomatoes. Put them in an oven heated to the lowest temperature with the door slightly ajar. Dry for 6 to 12 hours, depending on their size, until the tomatoes turn leathery. Let them cool in the oven before transferring them to jars. After a week, check for any condensation. If present, dry the tomatoes in the oven a bit longer. In warm…

Continue reading

Preppers’ Promised Land (Just Found)

If you’re currently living in a densely populated area but considering building a rural homestead, maybe one that’s off-the-grid, you must also think about which state is the best choice for building that homestead in.

Truth be told, you can find rural land to build a homestead and live a self-sufficient lifestyle in literally any of the fifty states. Yes, even Hawaii. But there’s also no denying that some states have a serious advantage in this regard over others.

The one state that might have the most advantages over any other is a state that many people have not even heard of: Idaho.

While it’s mostly known for its natural beauty and ski resorts, Idaho also has many things going for it for why it may be the most overlooked state for those looking for property to live a rural and self-sufficient life.

Is Idaho the prepper’s promised land that you’ve been searching for? Only you can decide if it is for yourself, but here are some good reasons why you should strongly consider it:

Homesteading/Off-Grid Laws

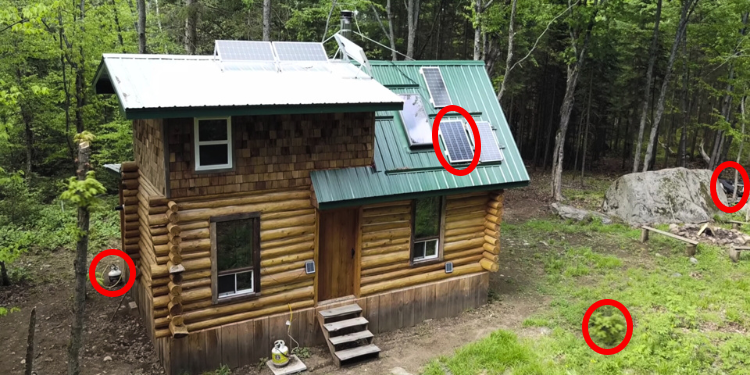
Preppers' Promised Land (Just Found)Idaho has some of the most relaxed laws on homesteading and off-grid homes in the entire country.

There are very few restrictions on how many acres you can own, and in most areas you can build a home without a permit.

Fortunately, you don’t need a lot of land to become completely self-sufficient. In fact, 1/4 acre is enough, if you follow this comprehensive guide.

Living off-grid in Idaho is 100% legal, so long as you’re not violating any local building codes. You’re also legally allowed to harvest rainwater on your property as well.

The state also offers a homestead exemption that grants owners of homestead a $100,000 protection from their creditors if they file a Declaration of a Homestead. This means that your homestead cannot be seized, so long as it is your primary residence, if you have a pending debt.

Idaho also offers a tax credit from the income tax for 40% of the solar system that you set up to generate off grid power, and that’s on top of the tax credit that you can get at the Federal level.

Mountains

Located right along the Rocky Mountains, Idaho is a very mountainous state. While the southern region of the state around Boise is dry and flat, the northern and eastern parts of the state are very mountainous.

One of the main features that you should look for in a homestead is for it to be surrounded by mountains or hills to help block it from view from anyone traveling along the freeways or highways and to ensure it’s more hidden. It’s not hard to find such property for sale in Idaho.

Good Soil For Gardening And Farming

Preppers' Promised Land (Just Found)The lands of Idaho are fertile, although in the northern areas of the state it should be noted that the growing period of…

Continue reading here

Air Rifles as Survival Tools. Breathing, sight picture, trigger control, and shot placement.

Quiet, hard-hitting, accurate, affordable, and reliable. A good quality air rifle in .177 or .22 caliber meets all these criteria. No, you don’t have to spend thousands. Just one hundred to three hundred FRNs will provide you and your family with a nice rifle and several thousand pellets.

Springer and now gas ram rifles take care of problem pests around the garden and homestead, rabbits, gophers, ground squirrels, starlings, and crows are dealt with humanely and did I say quietly?
My German-made Dianas, both a Model 34 Classic, and a Model 34 EMS, and both in .177 caliber are equipped with inexpensive scopes and will easily maintain quarter-size groups at 30 yards, Both will push a heavier 9.5 -10.5 grain pellet out to rabbit and squirrel killing distances of 40-50 yards, if you do your part with pellet placement. As many old hunters said it’s not so much what you hit them with as where you hit them.

As a teaching tool for kids and folks not raised with firearms the air rifle excels as its quietness and simplicity encourages rather than intimidates new shooters in learning to practice both safe handling and proficiency, in my experience familiarity with arms does not breed contempt, but rather respect.

The choices of air rifles today is great and the quality of the offerings from manufacturers like Crosman, Ruger, Diana, Gamo, Hatsan, Beeman, Benjamin, and Weihrauch span the price range from less than $100. to $500, and even $700. Given the quality of what is on the market, this is a good time to get into air rifles. Even the lowest-priced offerings provide good homestead and backyard pesting performance while the mid and higher-priced options are match-quality rifles with accuracy to test your skill.

Around our homestead, the air rifles keep the gophers, ground squirrels, and crop-destroying birds at bay from the orchard and garden and have even accounted for a possum who was raiding the back porch cat food. The entertainment factor for the great-grandkids with targets and good backstops is a nice afternoon occupier for them while grandma is trying to put dinner or such foodstuffs together to stave off the clamoring hoard.

For our back porch day and night rifle, we have an older Gamo in 177 equipped with both a led light and a red laser adjusted to put pellets spot-on at 15 feet. It also wears a Bushnell 1-4 scope zeroed in at 25 yards, this happens to be the distance from the back deck to the first row of fig trees. This rifle accounted for between 16 and 19 rats one winter when an infestation of the critters started moving onto our place and our cat was only four months old.

For many years a Benjamin pump in .22 caliber was the go-to air rifle that lived with us but my age and old eyes started requiring the assistance of optics to keep the rats and pigeons in check in the barn so a break-barrel Diana 34…

Continue reading here

6 Common Prepping Mistakes You Should Avoid

In our ever-evolving world, it seems that each passing day brings an influx of individuals seeking solace within the embrace of preparedness. They flock towards the notion, so to speak, driven by the mounting uncertainties that loom over our existence. It comes as no surprise that people are yearning to equip themselves with the necessary skills and knowledge to effectively weather emergencies and navigate through crises, be they colossal or minuscule in scale.

However, akin to the multifaceted facets of life, there exists not just a right way but an infinite multitude of wrong ways to embark upon this noble pursuit. Let us now embark on a profound exploration, an in-depth analysis of the most common prepping mistakes that befall enthusiasts on their preparedness journey. By shedding light on these blunders, we aim to illuminate the path towards a more effective and fruitful preparedness endeavor.

Failing to make a plan

One of the most critical mistakes that individuals often make when venturing into the realm of preparedness is the failure to create a comprehensive plan. In the rush to accumulate supplies and gather resources, the significance of developing a well-thought-out roadmap is often overlooked.

A lack of a solid plan leaves individuals vulnerable and ill-prepared to handle emergencies and crises effectively. Without a clear direction and a strategic approach, their efforts may become fragmented and disorganized, resulting in wasted time, resources, and potentially dire consequences.

A comprehensive preparedness plan serves as a guiding beacon, illuminating the path forward and ensuring that all essential aspects are taken into account. It entails a thorough assessment of potential risks and hazards, considering both the broad spectrum of emergencies and the specific circumstances unique to an individual or community. By identifying these potential threats, one can tailor their preparedness efforts accordingly, focusing on the areas that require attention the most.

Moreover, a well-crafted plan takes into consideration various factors, such as geographic location, local infrastructure, and personal circumstances. It outlines specific objectives and milestones, providing a sense of direction and purpose. Whether it’s creating an emergency communication plan for family members, establishing designated meeting points, or outlining evacuation routes, each element contributes to a more robust and resilient preparedness strategy.

A comprehensive plan includes a realistic assessment of available resources, both material and human. It helps individuals prioritize their needs, ensuring that essential supplies and equipment are obtained and maintained. This proactive approach minimizes the risk of shortages during times of crisis and enhances overall preparedness.

A well-crafted plan also accounts for the importance of ongoing education and skill development. It recognizes that preparedness is not solely about stockpiling supplies but also about acquiring the necessary knowledge and capabilities to effectively utilize them. It encourages individuals to invest time in learning essential skills such as first aid, basic survival techniques, and self-defense. By honing these abilities, individuals become more self-reliant and capable of handling various emergencies that may arise.

Neglecting Gear Testing

<img src="https://prepperswill.com/wp-content/uploads/2023/05/Neglecting-Gear-Testing-1024×576.jpg" alt="neglecting…

Continue reading

For Love of a Troy Bilt Horse. The Horse uses a 140 weight GL-4 gear lube.

During my life, I have had plenty of experience with horses of the four-legged variety, acquired mostly while raising horse-loving daughters. Generally speaking, I found them to be expensive, messy, occasionally dangerous, and by the way did I mention expensive? My daughters have grown up so we no longer have horses on the property but the experience gained from this time may prove valuable should society or our infrastructure deteriorate.

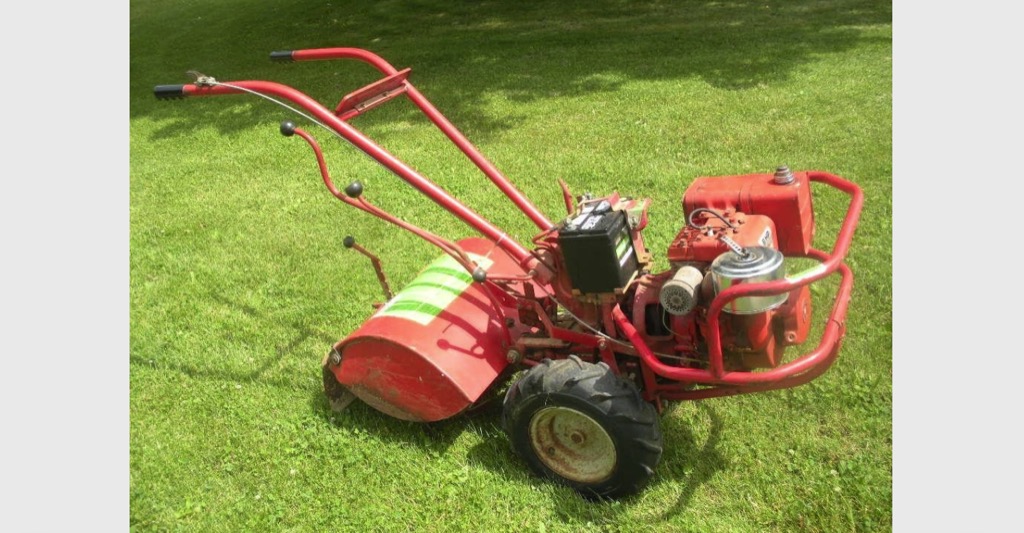
I have chosen to write today about a horse of a different color namely red Troy Bilt Horse rototillers which have become an interesting part of my life in recent years. Food production and distribution issues have developed in ways that I had never expected to see here in the US. Having lived overseas in places where these problems are commonplace, I have learned of the value of local and personal food production in the form of a garden. A decade ago, I started developing a 1/10th acre garden next to our newly built rural home. The land was originally a productive field but after the construction process the soil was more compacted construction debris than fertile. So began my quest to build it into a decent garden. As a kid, my father had a small backyard garden that we turned and prepared using a shovel and rake. Back then I remember seeing ads for Troy Bilt Horse rototillers with pictures of beautiful turned soft soil that begged to be planted in.

Unfortunately, there were no funds for such labor-saving devices so we continued to do things by hand. Remembering this, I located a well-used 1970s-vintage full-sized Troy Bilt Horse rear-tined tiller on Craig’sList and started my new adventure in gardening with a real tiller. My “new” Horse had an 8 horse power Tecumseh engine and I soon discovered one of the reasons they are called a Horse. There is a depth gauge that limits how deep the tines can dig into the soil. However, if you get greedy and try to dig too deep/too fast in hard packed soil, the tines will quickly pull you forward taking you for a poorly controlled ride.

The newer Horse models come with a “dead man’s switch” so that if you let go of the handles the engine dies. Mine lacked that safety future so my 210 lb. frame got to wrangle the Horse a number of times before I learned how to set the depth for shallow light passes. The trick in heavy soil is to make multiple passes going progressively deeper. Eventually, the soil is broken up into fine and well-aerated soil. One of the signature features of the Horse tiller is the ability to turn the handles to the side. This allows you to walk alongside using one hand to control the tiller after the soil has become loose so you do not pack it down by walking on it. The cover of the Owner’s Manual has a picture showing this.

Initially, I had to break up hard, machinery-compacted clay…

Continue reading

How to use hemostatic agents

Achieving hemostasis, also known as rapidly stopping bleeding, is a crucial skill that the survival medic must master. In survival situations, bleeding can stem from a range of sources, including falls on rough terrain or confrontations with hostile groups. If bleeding wounds are not treated effectively, it can result in avoidable fatalities among survivors.

Blood clothing basics

Blood clotting, or coagulation, is a complex process that involves multiple steps and various components of the blood. The primary function of blood clotting is to prevent excessive bleeding after an injury, but it can also lead to the formation of clots in the blood vessels, which can cause serious health problems.

When a blood vessel is damaged, the body responds by constricting the vessel to reduce blood flow to the site of the injury. This vasoconstriction is followed by the activation of platelets, which are small cells in the blood that help to form clots. Platelets adhere to the site of the injury and release certain chemicals that attract more platelets to the area. These platelets then begin to aggregate and form a temporary plug to stop the bleeding.

The next step in the clotting process is the activation of the coagulation cascade. This involves a series of chemical reactions which convert a protein called fibrinogen into fibrin, a stringy protein that forms a mesh-like network over the platelet plug. The fibrin network reinforces the platelet plug and forms a stable clot that seals the injured blood vessel.

The coagulation cascade involves many different proteins and factors that work together to ensure that the clotting process is effective and controlled. Some of the most important proteins involved in the cascade include prothrombin, thrombin, and fibrinogen.

Prothrombin is a protein that is produced in the liver and circulates in the blood. When the coagulation cascade is activated, prothrombin is converted into thrombin, an enzyme that plays a key role in converting fibrinogen into fibrin.

Fibrinogen is a protein that is also produced in the liver and travels in the blood. When the coagulation cascade is triggered, fibrinogen is cleaved by thrombin to form fibrin.

In addition to platelets and the coagulation cascade, the clotting process also involves the action of several natural anticoagulants that help to prevent excessive clotting. These include antithrombin III, protein C, and protein S.

Stop the bleeding to save lives

It was estimated that close to 25 percent of combat deaths in military conflicts could have been survivable with prompt and appropriate actions. A skilled survival medic equipped with the right knowledge, training, and tools can save lives in such situations. For instance, a caregiver equipped with a tourniquet is more likely to be successful than one without.

Hemorrhage control agents, also known as “hemostatic” agents, are available commercially and can effectively stop heavy bleeding. However, the ideal hemostatic agent should work quickly, be portable, have few complications, not interfere with tissue healing, and be reasonably priced. Unfortunately, the…

Continue reading

A Retreat for Aging Preppers. Rainwater barrel recovery system

Addressing the problems facing aging preppers.

Start early!

Our initial problem was two-fold: Finding sustainable land while still trapped until I was retirement-eligible. Two years before retirement, we began our search for viable land approximately 100 miles from any major city. Our initial search was for about 20 acres, a nearby small town, and off of well-traveled roads. The land had to have a water source with a full-year-running creek.

Remember moving to an unknown rural community places you at a disadvantage of finding appropriate skilled help and unscrupulous persons who will overcharge you based on your lack of knowledge.

After locating a property, we purchased the acreage. About two-thirds of the property was clear-cut for pine lumber some 4 to 5 years earlier, which left an overgrown mess of brambles, briars, and debris The costs of clearing the land was substantial and we had not really budgeted for the costs. Not having any farming background was a disadvantage.

If you are in the market for land, do not think that the low cost of the acreage is better than a more expensive acreage that is already cleared and usable.

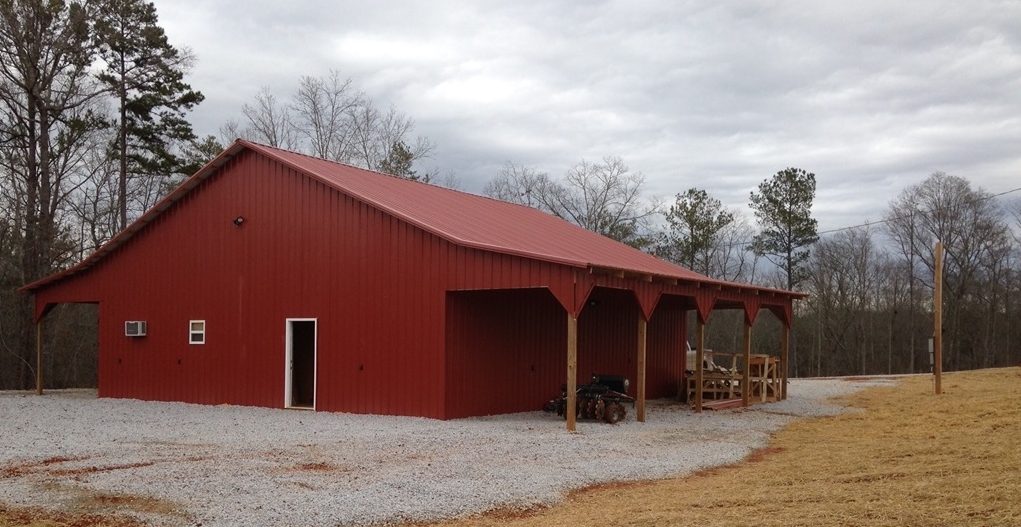
About one year from my retirement, we began initial improvements. We paid to bulldoze a path/driveway towards the rear of the property and clear a place for a 40×40 metal barn with 10 ft overhangs on both sides. Due to the distance between our current home to the property being about 100 miles, my husband was ingenious in designing the barn. Inside the barn, 1/4 of the space was used to build a fully functional apartment. We created our own little residence inn that included bathroom with sink, toilet, and shower. One wall contained a kitchen sink, microwave, stove, refrigerator and cabinets. It contained a small closet and the room for a bed and small table for eating. It was completed with a dual ac/ heating window unit.

Additionally, a septic system, well, and electricity was included in the build. This allowed us to come to the property on long weekends and vacation time to oversee the building of our home and begin moving woodworking equipment/storage etc. to the barn.

We were able to monitor any movement via a camera connected to our phones. If you are in a similar situation of trying to get away from the city, but are prevented by your current work situation, this is a good idea, that enables you to begin the process of relocating. Also, during the building of the barn, it seemed like all of the locals showed up one day to examine the strange barn concept.

I believe it was imperative to demonstrate the security system we installed to show local inhabitants the immediate notifications on our phones. I believe this may have prevented loss of property.

The building of the main home became a nightmare of costs, problems, and delays. As with any construction, you can’t move forward on other items until the first is completed. In a rural setting,…

Continue reading

Recipe for Spanikopita from Mrs. Alaska

The following recipe for Spanikopita is from SurvivalBlog reader Mrs. Alaska.

She writes:  This recipe is adapted from one in the wonderful book, The Boreal Forest, by Beverly Gray.

While traditional spanakopita is made with spinach, feta cheese, and phyllo pastry, the fact is that the filling can be made with ANY cookable leafy green (wild or domesticated) and any cheese. The phyllo, too, can be replaced with pie crust (so it would then be a quiche) or topped with biscuits, or spread over puff pastry.

For the spanakopita:

Preheat oven to 375 degrees.

Mix together 2 cups of feta (or other cheese), 2 cups of cottage (or other) cheese, 5 eggs, 2 TBS of flour or corn starch, herbs and seasonings of choice —  such as salt, pepper, oregano, and basil. I also add the juice and zest of one lemon.

In a wide pan, on low heat, wilt 5 cups of chopped greens with NO WATER. Traditionally, this is spinach, but I have also used dandelion, cabbage, and mixed leaves of beets, turnips, mustard, radish, lamb’s quarter, broccoli, and cauliflower. Obviously, the flavor will vary but the texture will not.

Add the wilted greens to the cheese mixture.

To make with phyllo:

Melt a stick of butter.

Butter a 9 x 12 baking pan.

Unroll a package of phyllo and cover the sheets so they will not dry out as you work.

One at a time, layer about 8 leaves of pastry, buttering each one. Then spread half or all of the greens/cheese mixture. Top with another 8 leaves of pastry, each one buttered, or insert an intermediate layer of phyllo if you wish.

Bake, uncovered for 45 minutes or until the topping is golden brown.

STORAGE

This freezes well and reheats well. I love it for breakfast with a fried egg on top.

Alternatives include pre-baking a pie shell or puff pastry and then topping them with the cheese/greens mixture and cooking for another 20 minutes for the thinly topped puff pastry or 40 minutes for the quiche.

Mrs. Alaska writes a blog about her off-grid life in remote Alaska.

Do you have a well-tested recipe that would be of interest to SurvivalBlog readers? In this weekly recipe column, we place emphasis on recipes that use long-term storage foods, recipes for wild game, dutch oven recipes, slow cooker recipes, and any recipes that use home garden produce. If you have any favorite recipes, then please send them via e-mail. Thanks!


Continue reading

So, Is It Illegal To Collect Rainwater in Minnesota?

For self-reliant folks, obtaining and keeping access to off-grid utilities is critical if you want to be prepared for the worst situations possible.

Luckily, one of the most critical resources, water, is also the easiest to obtain totally off-grid by the use of rain-catching systems.

flag of minnesota

These systems can supply hundreds of gallons of water from just a passing storm. But, as hard as it is to believe, collecting rainwater is not always legal, and in some states it is heavily regulated.

How about Minnesota? Is it illegal to collect rainwater in Minnesota?

No, it isn’t illegal to collect rainwater in Minnesota though setting up your own system will require you to get permitted and adhere to Minnesota board plumbing codes. Minnesota has its own plumbing code which is not uniform with international standards, making this trickier than it has to be.

The good news is that you can harvest rainwater for non-potable purposes in Minnesota, but the bad news is you’ll have to go through a proper dog and pony show trying to check all of the boxes required for the Minnesota plumbing board to get your permit.

It’s not great, but at least it’s possible. I’ll tell you everything else you need to know about Minnesota’s rainwater collection laws below…

Is Collection of Rainwater Illegal at the State Level in Minnesota?

No, collecting rainwater is not illegal at the state level in Minnesota as explained in Minnesota Administrative Rules 4714.1602.

However, as previously mentioned, the implementation of any rainwater harvesting systems requires obtaining permits and compliance with the Minnesota Plumbing Board, or MPB.

The MBP regulates the design, installation, and maintenance of plumbing systems including those for rainwater harvesting through the Minnesota Plumbing Code.

Minnesota law requires that harvested rainwater is used only for non-potable purposes and must be properly stored to prevent contamination.

Rainwater must also be used in a way that doesn’t cause harm to public health or the environment.

Is Collection of Rainwater Illegal at the County Level in Minnesota?

No, at least in no county I found. But, do keep in mind that county or local laws and guidelines may have additional regulations or restrictions on the collection and use of rainwater beyond what the state law imposes.

Some counties may have sharply limited or totally prohibited the installation of rainwater harvesting systems due to water shortage or contamination concerns.

You must check with your county and city or town for guidelines before buying equipment and implementing a rainwater harvesting practice.

You may also need additional local permits beyond what the state demands: failing to do so may entail fines and charges.

Under What Conditions Can Citizens Collect Rainwater in Minnesota?

Citizens can generally collect rainwater whenever they want in Minnesota so long as they have an inspected and permitted system for the purpose.

Something to bear in mind is that, despite the state allowing “at will” collection for approved…

Continue reading