Fencing Out Deer? Make Sure the Fence Bottom is Secure

After several years of keeping hungry deer out of my orchard with an 8-foot perimeter fence, one stubborn deer is repeatedly breaching my defenses to munch on corn beds, devour sunflowers, and enjoy a leaf buffet.

When I first spotted the deer in my orchard, I assumed part of my fence must have been damaged. My orchard is surrounded by forest on three sides, and the fence weaves among trees to use them as fence posts, so the fence can’t be examined at a glance. I had to take a walk through the woods (braving mosquitos along the way) to check its integrity.

I was confused to find the fence in (mostly) good shape, still standing tall. There were a couple little issues here and there causing the fence to sag, but nothing too dramatic. And this remained the case even after the deer made its way into the orchard again … and again … and again.

Look Down

But on one occasion, I startled the deer and it promptly escaped by slipping underneath the fence, pushing up the black plastic with its nose and darting off into the woods. Suddenly, a lightbulb went on in my head.

It turns out that during the course of my many perimeter checks, I’d focused too hard on the height of the fence (to prevent the deer from jumping over) and not enough on the bottom of the fence where it meets the ground. When I’d built the fence, I’d folded the bottom 6 inches outward and pinned it down with metal stakes to discourage deer from pushing underneath.

But wear and tear over time had caused the bottom of the fence to break free of the stakes in some places. This provided opportunities for the deer to push the fence up, slip underneath, and wreak havoc.

Subscribe now

Patching Things Up

At the moment, I’m in the middle of making significant fence repairs and improvements to end the deer invasion. Years of maple leaves blown against the bottom of the fence mark places where the deer clearly isn’t nosing under, but any place where the bottom of the fence is exposed is getting enhanced.

In some places, I’m stapling blocks of wood or old wooden fence posts to the bottom of the fence to pin it down. In other places, I’m installing sections of welded wire to create a strong barrier that can’t be pushed away so easily. I’m also planning to use a metal detector to locate the original metal stakes (which are buried under leaf litter at this point) and put them back into proper use.

It’s a time-consuming project, but I’m making progress. And I don’t think the deer has returned to my orchard in several days now.

It goes to show that when installing a deer fence, the integrity of the bottom is every bit as important as the height. Come to…

Continue reading here

30 Years Shelf-Life Survival Soup (In A Jar)

We are on the cusp of a massive food revolution in the nation and the world.

As preppers we know the value of shelf stables foods that can last for decades. When the news gets crazy nothing feels better than knowing your family can eat even through intense social upheaval.

I want to share with you my recipe for a 30-year survival soup that can be stored in a mason jar or even in Mylar bags. This soup mix is healthy, flavorful, and very easy to prepare. Once stored it will last 30 years,

Make The Bean Mix

This bean mix can be prepared and then stored in Mylar bags for the long term. Mark your bags bean mix so you know what you have in there.

This will give you the ability to throw this soup together long after supermarkets are offline.

Related: Looming Grain Shortage. Do This Before It’s Too Late

30 Years Shelf-Life Survival Soup (In A Jar)

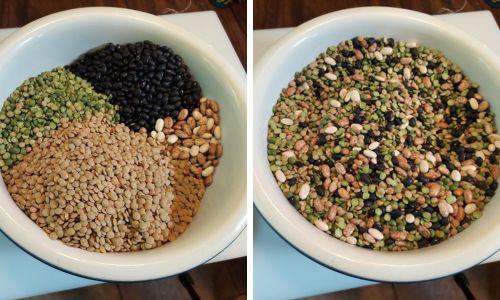
  • 32 ounces green split peas
  • 16 ounces dried green lentils
  • 16 ounces dried black beans
  • 16 ounces dried pinto beans
  • 16 ounces dried navy beans

Make The Spice Mix

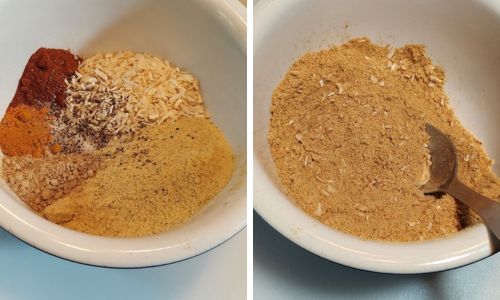
Mix the following ingredients together.30 Years Shelf-Life Survival Soup (In A Jar)

  • 1 ½ cups of bouillon
  • ½ cup dried onion
  • ¼ cup paprika
  • ¼ cup turmeric
  • ¼ cup ground ginger
  • 2 teaspoon ground black pepper
  • 2 teaspoons of sea salt

Fill small Ziplock bags ½ a cup of spice mix. These are going to go into your mason jars atop the bean mix.

You need to cook the beans separately, so it is important to keep the spice mix separate from your beans. If you cook beans from the raw state with salt, then it can make them very tough.

Filling The Mason Jars

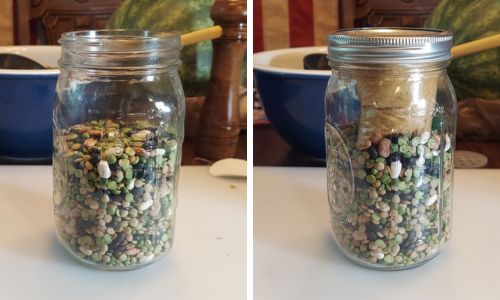
Each jar is going to get 2 cups of the 5-bean mix and a Ziplock with ½ cup of spice mix.30 Years Shelf-Life Survival Soup (In A Jar)

Preparing The 30 Year Survival Soup Recipe

Ingredients:

  • 2 cups of 5 bean mix
  • 6 cups water
  • 1 Ziploc or ½ cup of spice mix

Instructions:

1. Start by soaking your 5 bean mix overnight. This will make the bean cooking process much quicker. Cooking the beans will be the longest part of the recipe.

Related: Canning Mormon Beans For Long Term Preservation

2. In the morning rinse your bean mix and put in a pot with at least 6 inches of water above the beans and cook 1 ½ hours. The beans should be tender at this point. It is best to let them cool in the pot before adding them to the soup. The cooking process will continue in hot water.

3. Add four cups of water to soup pot and then dump in the remaining ingredients. Bring this mix to a simmer and stir along the way. Once this…

Continue reading

Designing an Earthship Shelter: 7 Things You Need to Know

Earthship shelters are sustainable and resilient structures that have been gaining popularity among environmentalists and survivalists. What’s so appealing about these rudimentary shelters? What should you know if you want to build one?

Here’s how an earthship shelter functions and the seven most important things in its development.

What Are Earthship Shelters?

Earthship shelters are underground or partially underground buildings made of 100% earthen and recycled materials. They can control their indoor climates without fuel or electricity through efficient ventilation, dense self-supporting walls and natural lighting. Since they’re underground, they can also easily tolerate the outdoor elements.

However, earthships still need a source of electricity to power their indoor appliances — usually solar panels or wind turbines. They might look like basic structures on the outside, but on the inside, they have the same amenities as any other home. They feature kitchens, bathrooms, bedrooms and relaxation areas despite their limited square footage.

Earthships are also designed to grow food and harvest water from rainfall and other natural sources. They even have waste disposal systems. An earthship shelter is about as off-the-grid as it gets. They’re similar to “hobbit holes” from “Lord of the Rings,” from their appearance to self-sufficiency.

The average earthship shelter requires about 25% less energy than a home. Its underground bunker-like design also makes it resistant to extreme weather conditions. Earthships are excellent alternative living situations for people who want to minimize their carbon footprints and maximize their independence.

Here’s a closer look at these features so you can start brainstorming for your own earthship shelter.

1.    Location, Location, Location

Location is the most important factor when planning your earthship shelter’s construction. The ideal environment for earth shelters is an area with the full experience of all four seasons and low humidity levels. This climate has plenty of food sources and gets enough rainfall for water harvesting but not enough to wash out the site.

While the above-ground temperatures can fluctuate from zero to triple digits, underground temperatures in these climates have little to no variance. This allows the earth to naturally moderate the earthship’s indoor environment, absorbing heat from the structure during the summer and insulating it during the winter.

Topography is another factor to consider. Building an earthship into an existing slope requires less excavation, but you might encounter some rocky terrain. Creating a new gradient on a flat surface requires more excavation, but the earth will likely be more soft and malleable.

In any case, the slope must face southward to maximize its sunlight exposure. It must also consist of granular soils such as sand or gravel. These materials are easy to move around during construction and can also pack close together and strengthen the building. Their permeability also makes them highly effective at draining water.

Earthship shelters must be in a spot that naturally drains water from the site. The nearest bodies of water should be downhill to…

Continue reading

The following recipe for Oven Pancakes is from our Daughter-In-Law.

The following simple recipe for Oven Pancakes is from our Daughter-In-Law, Super Mom. After baking, it is served in sliced squares.

Bake in a large cast iron skillet or a 9″x13″ baking dish. This recipe feeds 4-6 adults.

Ingredients
  • Half dozen eggs
  • 1-1/2 cup flour
  • 1-1/2 cup milk
  • 1/4 cup butter
  • 1/2 tsp salt
  • Splash of vanilla (optional)
  • Cinnamon (optional)
  • Maple syrup (optional)
Directions
  1. Set the oven to 400°F.
  2. Preheat the pan and melt the butter in the oven.
  3. Blend the remaining ingredients to make a thin batter.
  4. Carefully pour the batter into the melted butter.
  5. Bake for approximately 20 minutes, or until puffed high and golden brown.
SERVING

Cut into serving-size pieces and serve hot, still puffed from the oven. Top with butter, peanut butter, jam, and/or maple syrup.

STORAGE

Leftovers can be refrigerated.

Do you have a well-tested recipe that would be of interest to SurvivalBlog readers? In this weekly recipe column, we place emphasis on recipes that use long-term storage foods, recipes for wild game, dutch oven recipes, slow cooker recipes, and any recipes that use home garden produce. If you have any favorite recipes, then please send them via e-mail. Thanks!

Continue reading

What Happens If You Put Banana Peels In Your Garden?

If you thought banana peels were only good for slipping on or throwing away, think again. These humble fruit skins are actually a hidden gem when it comes to gardening.

Packed with nutrients like potassium, phosphorus, and calcium, banana peels can do wonders for your garden’s health and productivity.

In this gardening guide, we’ll explore the various ways you can harness the power of banana peels to transform your garden into a thriving oasis.

From making nutrient-rich compost to creating natural pest repellents, we’ll reveal the secret tips and tricks that will make your plants flourish.

So, whether you’re a seasoned gardener or just starting out, get ready to unlock the full potential of banana peels and take your gardening skills to the next level.

Don’t toss those peels in the trash – they hold the key to a luscious and bountiful garden!

The Benefits Of Using Banana Peels In The Garden

Banana peels may seem like just another kitchen waste, but they are actually a treasure trove of benefits when it comes to gardening.

These peels contain essential nutrients and organic compounds that can boost your garden’s health and productivity.

What Happens If You Put Banana Peels In Your Garden

Apart from their nutrient content, banana peels also offer other advantages in the garden. They act as a natural fertilizer, providing slow-release nutrients to the soil, and they can also help deter pests.

The organic compounds present in banana peels act as natural repellents, keeping common garden pests at bay.

Additionally, banana peels can be used to make nutrient-rich compost, enriching the soil and promoting long-term soil health. You can learn here how to test soil health the way pioneers did.

With all these benefits, it’s no wonder that banana peels are becoming a popular choice among gardeners looking for natural and sustainable gardening solutions.

How To Prepare And Store Banana Peels For Garden Use

Using banana peels in the garden is simple and easy, but it’s important to know how to prepare and store them properly for optimal results.

The first step is to collect banana peels after eating the fruit. It’s best to use organic bananas to avoid any potential pesticide residues.

Once you have collected the peels, rinse them thoroughly to remove any dirt or debris. You can also gently scrape off any remaining fruit flesh from the peels.

After cleaning the peels, you have a few options for storing them. If you plan to use the peels immediately, you can keep them in a sealed container or bag in the refrigerator. This will help preserve their freshness and prevent any unpleasant odors.

Alternatively, you can also dry the peels for future use. To do this, simply lay the peels out in a single layer on a tray or baking sheet and let them air dry for a few days. Once dry, you can store them in an airtight container in a cool, dark place.

Ways to…

Continue reading

Surviving the Swarm: 7 Preparedness Tips for Dealing With Bugs Outdoors

Whether you’ve been a prepper for years or you’re just getting into it, you likely spend a lot of time outdoors, enjoying everything nature has to offer to keep you safe and sustained. But, there’s one thing we can all probably agree on – no one wants to deal with annoying or dangerous insects when they’re outside.

There are plenty of reasons to love certain bugs. Without bees, we’d have no food. Mosquitoes are pollinators, too. Spiders kill and eat bugs to keep the population down. Ants aerate the soil and disperse the seeds of native plants. It’s hard to find a bug without some type of purpose.

But, that doesn’t mean you want to deal with them buzzing around your head, stinging, biting, or swarming when you’re trying to spend some time outside. Thankfully, there are preparedness tips you can put in place to keep bugs away. You don’t necessarily have to focus on “getting rid” of insects to make sure they don’t bother you. Let’s cover a few of those tips so you can enjoy spending more time outside, especially in the summer, without having to worry about the effects of a swarm or infestation.

1. Weigh the Pros and Cons

Spending time outside is good for your mental and physical health. As a prepper, you’ll need to know the lay of the land, and how to survive in nature if a disaster ever strikes. So, spending as much time outside as possible now will benefit you in the present and future. One of the best ways to enjoy those benefits is to simply take a walk. There are countless benefits to walking daily, including:

  • Stronger muscles
  • Boosted energy
  • Maintained bone strength
  • Weight management
  • Better sleep
  • Boosted immunity
  • Less joint pain

Outdoor physical activity can also help to reduce stress and improve your mood. It’s a great way to stay in shape while managing your mental well-being, too. It’s hard to find a drawback that beats that!

But, it’s never a good idea to spend time outside without knowing what you might be up against. Taking a walk around the neighborhood is one thing. But, if you’re going to be exploring wooded areas, fields, or other rough terrain, understand that you could run into rodents, snakes, and plenty of insects. While that’s not necessarily a bad thing, you’ll need to mentally and physically prepare yourself for dealing with those things before you hit the hiking trail.

2. Learn Insect Habits

One of the best ways to make the most of your outdoor time is to educate yourself on when bugs are most active. A lot of it depends on where you live, but you can plan some of your outdoor excursions on when you’re least likely to run into buzzing pests.
For example, you might want to spend more time outdoors in the fall when the weather starts to cool off…

Continue reading

How to re-grow produce you bought from the store

For preppers, being frugal means adopting a mindset and lifestyle that emphasizes resourcefulness, efficiency, and careful financial management in preparedness activities.

Being frugal is about making the most of available resources and minimizing wastefulness, allowing us to optimize our preparedness efforts while being mindful of our budgets. Today’s article may seem like a novelty for some, while for others, it is nothing more than an old practice that helps them give new life to kitchen scraps.

The approach of regrowing produce from seeds found in various vegetables and fruits or rooting herbs in water and transplanting them in the garden is a tale as old as time. The availability and the abundance of produce that can be found in today’s grocery stores have made things even easier for the frugal person.

The ability to continuously regrow produce not only helps you save money, but it also becomes a survival lesson that one day may be put to good use.  

Earn Your Food Independence NOW!

Using scraps

Regrowing produce from discarded vegetable parts is a sustainable practice that gives new life to kitchen scraps. Not only can you utilize scraps from your own kitchen, but you can also explore options at farmers’ markets and grocery stores. This approach minimizes waste as nothing is thrown away, and everything is repurposed.

For instance, take a peek into your cupboard and rescue any sprouted potatoes or garlic cloves that would otherwise be discarded. If you have dried beans on hand, take a handful and plant them. Similarly, if you’ve bought celery, trim the stalks about an inch or two above the base and plant the base in your garden.

By mastering the art of regrowing produce, a significant portion of the vegetables you harvest can originate from items initially purchased for consumption. Let’s explore the various options available for regrowing produce and making the most of our resources.

Growing new produce from seeds

Viable seeds can be obtained from fresh produce, and a lot of folks have tried growing their own produce using the seeds of a tasty fruit or vegetable they bought from the farmer’s market. While most of them did it out of curiosity, just to see if the seed would sprout and grow into a productive plant, others figured out how to perpetuate this practice and have a constant supply of fruits and vegetables.

Here are my favorite “experiments”:

Tomatoes

I love tomatoes, and my family eats lots of them on a daily basis, whether fresh or part of various dishes. In time, I’ve learned that regrowing tomatoes from store-bought produce is possible and can be a rewarding experience. Here are the steps to follow:

Choose a healthy, ripe tomato from the market. Look for a variety that is suitable for your climate and growing conditions.

Cut the tomato into halves or quarters and gently scoop out the seeds and surrounding pulp using a spoon. Place them in a small container.

To improve seed viability, some gardeners prefer fermenting…

Continue reading

Bugging Out: Realities. Storing preps in foot lockers and plastic totes.

I recently relocated from a rural suburb in a purple state to a much smaller community in a very red state. I had long-term plans to make this move, but an unexpected career change enabled me to move sooner than expected. While my new home is not a compound deep in the woods, it does provide me with more security, more privacy, the ability to expand my gardening efforts, the option of raising some chickens and/or rabbits in the future, abundant wildlife, and a smaller community where people go to church and value their freedom.

When making our relocation decision, my wife and I decided that we wanted a location that would be our final home. This was an extremely important decision, so we visited the general area on many occasions, getting to know the area, visiting many towns, and looking at a large number of properties and houses. This was a multi-year research effort. One of our considerations was the proximity to hospitals and doctors. The area we were considering was rural and mountainous. Some of the specific locations that we considered were ruled out as we believed them to be too far from appropriate medical treatment if one of us had a dire health emergency. We settled on a location that was rural and private but was an acceptable distance from a good hospital.

We purchased our red state home several months ago and only recently sold our purple state home and moved to our new location. During that interim period during which we owned both houses, we moved some of our materials and belongings so that we could sort of camp out in the new home during many trips there to make repairs and updates on the new house.

Bugging out by vehicle

It occurred to me prior to one of these trips, that I could use that trip to test what it would be like to bug out by vehicle. I needed to move my preps to the new location anyway, so I killed two birds with one stone. I have a mid-sized SUV and a hitch-mounted cargo carrier. Many years ago, I had developed my bug-out strategy. That included storing preps in foot lockers and plastic totes that could be easily stacked in my vehicle, after folding down both rows of back seats. In addition to that, I had also earmarked many of my non-electric tools for a potential bug-out. Some of these were tools that I still used fairly often. So I left them in my tool shed while placing yellow stickers on them, so that I could easily spot and gather them in a hurry. Other items that I would take included my inventory of freeze-dried food and clothing, shoes, etc. In order to maintain OPSEC, my firearms were placed in flexible covers, which were then placed in a very large golf bag cover with wheels. I also keep all of my important papers in a small file tote in a location where…

Continue reading here

Living Off the Land – How Do You Do It?

If you think of yourself as a rugged individual with a pioneering spirit that requires few modern-day luxuries, then living off the land might be for you. For those who live off the land, a good majority of their basic needs are met by Mother Nature: food, water, shelter, and heat, for example. And, of course, land. 

Obviously, though, you need a little more than a plot and a dream to make living off the land work. So before you make the leap, let’s take a look at what living off the land means and what you need to make a success of it.

You Need Land

First things first, you need land in order to live off of the land. Your land should provide as many resources as possible, not the least of which is water. 

Read: How much land do you need to be self-sufficient

Your plot of land should be able to produce food, although that can be accomplished in many different ways: 

  • Hunting
  • Fishing
  • Foraging
  • Fruit trees
  • Nut trees
  • Cacti
  • Gardens
  • Poultry
  • Livestock

Consider your needs when choosing a plot. One with a freshwater source will go a long way. 

Your land should also provide resources that can support your infrastructure, particularly your dwelling. The most obvious example is wood, which can contribute to cooking, heating, and building materials. 

You Need Food

Living off the land means no more grocery stores. You must develop adequate skills to put food on the table. The more avenues you have for food production, the better, but don’t bite off more than you can chew. 

Producing your own food is a lot harder than it looks, especially if you’ve never done it before. The learning curve is steep, so don’t spread yourself too thin. It’s better to learn one skill set well rather than many skill sets poorly. 

There are many ways to produce your own food, but how you do it will depend on your geographical area.

Meat and Poultry

Hunting and fishing are great ways to produce adequate sources of meat. Alternatively, you can raise your own livestock. 

Don’t overlook small game that you normally wouldn’t think about. People have been living off small game like squirrels, rabbits, and quail for centuries.

There are also exotic meats, like frogs, snakes, eels, alligators, and the like, that are plausible if they happen to be in your area. 

You’ll also need to know how to process and preserve your own meat or pay someone else to do it for you. Skinning and butchering are not for the faint of heart. This is especially burdensome when you have young children involved who often view animals as pets. 

Don’t forget eggs, which are also a great source of protein. One of the great things about living off the land is learning how to think outside the box. Eggs don’t have to come from just chickens. Many people get their eggs from quail, ducks, geese,…

Continue reading here

How To Can Amish Pot Pie

Many people hear Chicken Pot Pie and assume anywhere in the US, you’ll be receiving the same dish. But here in Amish Country, Traditional Chicken Pot Pie and Amish Chicken Pot Pie are in fact, quite different.

In this article, you will learn what those differences are and how to make and can a pot pie filling to use in either recipe.

The Amish community puts the Stead in homesteading. We can learn a lot from this group of incredibly united and self-sufficient people.

Taking great pride in their expansive farms, gardens, fields, and orchards – the Amish use their harvest in real-time turning the leftovers from one meal into elements for the next, while also storing away a large stock of canned goods for the months to come.

Here in Lancaster County PA, if you were having Amish Chicken Pot Pie aka “Slippery Pot Pie” it would be served in a bowl, piping hot with thick doughy noodle squares, and chunks of chicken with veggies in a stew or soup-like dish. It’s marvelously hearty.

In most other places, if you were having Chicken Pot Pie, that would look much more like an actual pie with a flaky buttery crust and a creamy chicken and veggie mixture.

Canning the filling of Amish Chicken Pot Pie will not only ensure a longer shelf life but also provide a valuable resource for you and your family during times of need, such as when disaster strikes or in SHTF scenarios.

Related: These Are The People You Want To Keep Around When SHTF

This preservation method guarantees that you’ll have access to a delicious dish loaded with vegetables and proteins, even when fresh ingredients may not be readily available.

Making Chicken Pot Pie Filling

  • 3 c. chicken
  • 1-2 garlic cloves, minced
  • 0.5 c. peas
  • 0.5 c. celery, chopped
  • 1 c. mushrooms, chopped
  • 1 c. carrots, diced
  • 1 c. onion, diced
  • 1.5 c. potatoes, diced
  • 6 cups stock
  • 3 tbsp. butter
  • 1 tsp. salt & pepper
  • ½ tsp. celery seed
  • ½ of a lemon, squeezed
  • sprinkle of herbs: thyme, parsley, or 1 bay leaf

How To Can Amish Pot Pie

Directions

1. In a large pot or pan, melt butter over medium heat. Sauté garlic and onions until fragrant, about 2 minutes. Add mushrooms and celery, cooking until softened, about 3 minutes.

2. Add carrots and potatoes, sautéing until golden and soft, about 6 minutes.

3. Stir in the stock and add salt, pepper, celery seed, and any additional herbs like your bay leaf and/or thyme.

4. Bring to a boil, then reduce heat to medium and cook uncovered for about 10 minutes, or until the vegetables are tender, stirring often.

5. Stir in the chicken, peas, and lemon juice. Once the chicken is cooked through, remove the bay leaf and take the pan off the heat.How To Can Amish Pot Pie

Pressure Canning The Chicken Pot Pie Filling

We…

Continue reading