16 Ways to Purify Water Off The Grid

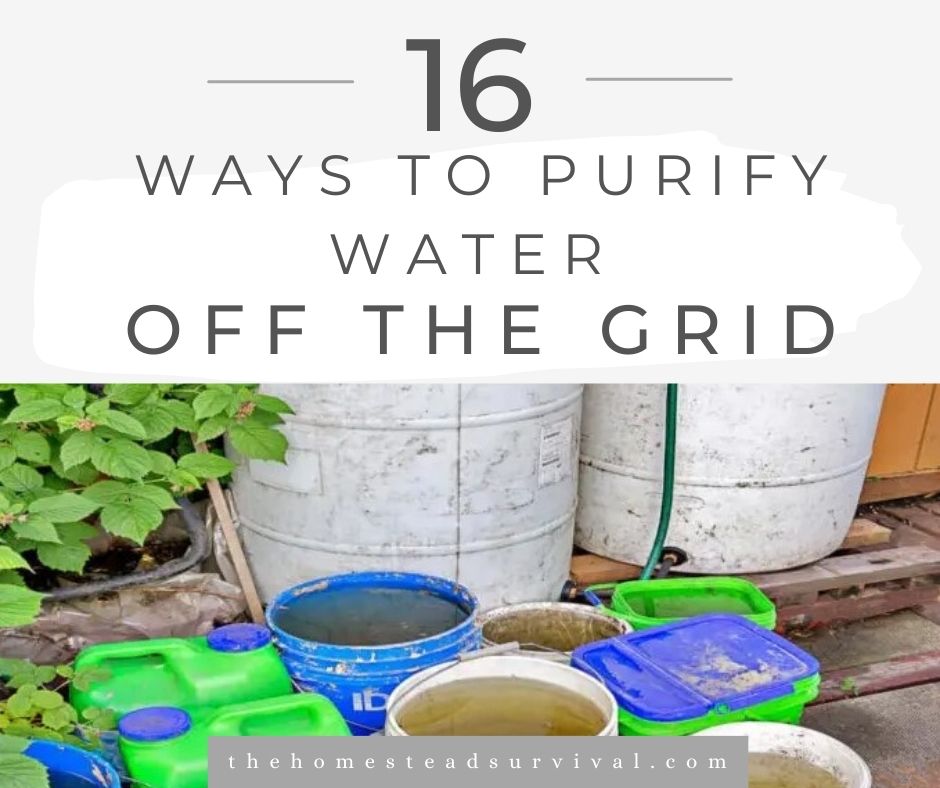
Water is a fundamental necessity for life. However, just because water appears clean doesn’t mean it’s safe to consume. The World Health Organization has highlighted that millions succumb to diseases from contaminated water annually. Especially when living off the grid or homesteading, access to public drinking water might be limited, emphasizing the importance of purifying your water. Here are 16 methods to ensure your water is safe for consumption when living off-grid.

Boiling Water

One of the most reliable methods to eliminate viruses, bacteria, and parasites from water is boiling. Bringing water to a full, rolling boil for a minimum of one minute is essential (three minutes for higher altitudes). However, it’s crucial to note that boiling won’t remove chemicals or particles, but it effectively kills harmful microorganisms.

Disinfection

Disinfection is another method to make water potable. Common disinfectants include household bleach, iodine, and water purification tablets. The EPA provides guidelines for disinfecting with bleach. It’s essential to maintain the correct bleach-to-water ratio to ensure safety.

  • Use eight drops of 6% bleach or six drops of 8.25% bleach per gallon of water.
  • If the water is cloudy or cold, double the bleach amount.
  • Stir and let it stand for 30 minutes.
  • If there’s a strong chlorine smell, transfer the water to another container and let it stand for a few hours.

Water Filtration

Water filters vary in their capabilities and types. They range from countertop filters to portable and whole-house filters. It’s essential to understand your filter type and ensure it’s suitable for your water source. Notably, water purification filters differ from standard water filters, which might only enhance taste but not purify the water.

Lifestraw Water Filters

Lifestraw offers a range of water filters tailored to filter various contaminants. They have single-person straw filters and larger, gravity-fed filters suitable for homesteads or camps. However, these systems rely on filters with limited lifespans, so monitoring usage and expiration is crucial.

Berkey Water Filters

Many homesteaders trust Big Berkey water filters for clean, safe drinking water. These systems, though a bit pricey, are highly effective, eliminating almost all contaminants. However, acquiring replacement filters off-grid might be challenging.

Distillation

Distillation involves boiling water to produce steam, which is then condensed back into water. This method removes nearly all impurities, but the resultant water might taste bland due to mineral removal. Distillation can be achieved using devices like an Instapot or a traditional pressure canner. There are also countertop distillation pots available for those with access to electricity.

Solar Still

A solar still utilizes the sun’s energy to produce pure water. It’s an excellent choice for off-grid living as it doesn’t require electricity. However, its efficiency might be compromised in cold or cloudy conditions. There are various DIY methods to build a solar still, including using a hole in the ground covered with a plastic sheet.

Ultraviolet Light Purification

Ultraviolet light can effectively disinfect water. Devices like the SteriPen are popular for purifying individual water bottles. However, larger UV purification systems for homes need electricity. Portable units, on the other hand, might operate on batteries.

Solar…

How To Make Sun-Dried Tomatoes With a Dehydrator: A Comprehensive Guide

Introduction

Ah, the joy of harvesting tomatoes from your garden each summer! Whether you’re a fan of the cherry variety like me or prefer the robust Romas, there’s something incredibly satisfying about plucking these red jewels. But what to do when you have a surplus? Sure, you can use them in salads, sauces, and even freeze them for later. But have you ever considered making your own sun-dried tomatoes? Don’t worry; you don’t actually need the sun for this. A dehydrator will do just fine, and it’s quicker and simpler!

Why Sun-Dried Tomatoes?

Sun-dried tomatoes are not just a fad; they’re a culinary delight that has stood the test of time. Their concentrated flavor can elevate any dish, from pasta and stews to sandwiches and omelets. They’re incredibly versatile and can be used in a myriad of ways:

  • In Pasta: Try them in our Sicilian pasta salad or mixed in our chicken and asparagus pasta with pesto.
  • In Breakfast: Add them to your omelets or scrambled eggs.
  • As a Snack: Yes, they’re delicious straight from the container!
  • In Sauces: Rehydrate them in boiling water and puree to make different types of sauces.

Choosing the Right Tomatoes

For drying purposes, Romas are usually the go-to choice. However, you’re not limited to just one type. Here are some other options:

  • Beefsteak: These are large and juicy, excellent for those who prefer a meatier texture.
  • Cherry: These tiny tomatoes are sweet and perfect for snacking.

Remember, always opt for the firmest tomatoes. Mushy ones will not yield the best results.

Step-by-Step Instructions

Prepping the Tomatoes

  1. Wash the tomatoes thoroughly to remove any dirt or pesticides.
  2. Remove the stems and any blemished skin.
  3. Cut into ¼-inch slices or in half. Thicker slices will take longer to dry out.

Seasoning (Optional)

At this point, you can sprinkle them with herbs for added flavor. Some popular choices are:

  • Oregano
  • Basil
  • Thyme
  • Garlic powder

Drying Process

  1. Arrange the slices on the dehydrator trays.
  2. Set the dehydrator to 150°F.
  3. Dry them out for about 10 hours maximum, checking every hour or so after the first 4 hours. They should take on a leathery texture.

Storage

Place your dried tomatoes in an air-tight container, and store them in the refrigerator or freezer. They should last for 6 months to a year with proper storage.

No Dehydrator? No Problem!

If you don’t own a dehydrator, you can also dry your tomatoes in a 150°F oven. Follow the same preparation steps and place the slices on baking sheets. It will take a few hours for them to achieve the desired leathery texture.

Additional Tips

39 Hearty Crockpot Recipes For Fall

39 Hearty Crockpot Recipes For Fall | Homesteading Easy Recipes tallest) { tallest = thisHeight; } }); group.height(tallest); } equalHeight($(“.dg-grid-shortcode .dg_grid-shortcode-col”)); $(window).resize(function() { equalHeight($(“.dg-grid-shortcode .dg_grid-shortcode-col”)); }); }); ]]> Sorry, this product is unavailable. Please choose a different combination. ]]>

Salt and Vinegar Dehydrated Zucchini Chips: A Crunchy, Healthy Snack You Can’t Resist!

Hey, fellow homesteaders and food enthusiasts! I recently stumbled upon this incredibly innovative and healthy snack recipe by Willow Moon on Create Mindfully. I was so thrilled by it that I just had to share it with you all. Willow Moon has crafted a delicious and nutritious alternative to traditional potato chips using zucchini or yellow squash. Trust me; you’re going to want to try this!

Why You Should Try This Recipe

  • Healthy Alternative: These chips are a fantastic alternative to the greasy, store-bought potato chips. They contain a touch of olive oil but are not greasy.
  • Great for Gardeners: If you have an abundance of zucchini or yellow squash in your garden, this is an excellent way to use them up.
  • Nutrient-Rich: The use of a dehydrator ensures that most of the nutrients are retained, unlike oven-baked chips.

Ingredients You’ll Need

How to Make These Chips

  1. Slice the Squash: Use a mandoline to slice the squash between ⅛” – ¼” thick. If you don’t have a mandoline, a sharp knife will do.
  2. Prepare the Mixture: In a medium bowl, mix apple cider vinegar, olive oil, and salt. Toss the sliced squash in this mixture.
  3. Dehydrate: Lay the chips in a single layer on a Teflon-lined dehydrator sheet. Dehydrate for 12 hours at 110° or until you achieve the desired crispness.

Storage and Shelf Life

  • Store the chips in an airtight container in the pantry.
  • They will stay fresh for about a week, although they can last much longer.

Variations and Additions

  • Vegan parmesan cheese
  • Garlic powder
  • Onion powder
  • BBQ Seasoning
  • Black pepper

Tips for the Perfect Chips

  • Thickness Matters: The thickness of the slices can affect the texture. Willow Moon prefers ⅛” slices.
  • Salt Levels: Always taste the vinegar mixture to check the salt levels.
  • Nutrient Retention: Dehydrate at 110° to keep the nutrients intact.

FAQs

Does zucchini dehydrate well?

Absolutely, zucchini dehydrates really well, leaving you with crispy chips.

How thick should I cut the zucchini for dehydrating?

Willow Moon suggests slicing the zucchini ⅛” thick for the best results.

Pair it Up!

These chips go incredibly well with Vegan Ranch Dressing or your favorite dip. So, don’t hesitate to pair them up for an even more delightful snacking experience.

Final Thoughts

Willow Moon has done an incredible job creating this healthy snack, and I couldn’t be more excited to try it out. It’s a great way to make use of the abundant produce from your garden and enjoy a guilt-free snack. So, what are you waiting for? Head over to Create Mindfully for the full recipe and give these Salt and Vinegar Dehydrated Zucchini Chips a try!

Happy Snacking!

How To Make Homemade Pasta Without A Pasta Machine

How To Make Homemade Pasta Without A Pasta Machine tallest) { tallest = thisHeight; } }); group.height(tallest); } equalHeight($(“.dg-grid-shortcode .dg_grid-shortcode-col”)); $(window).resize(function() { equalHeight($(“.dg-grid-shortcode .dg_grid-shortcode-col”)); }); }); ]]> Sorry, this product is unavailable. Please choose a different combination. ]]>

Custom Merry-Go-Rounds for Chickens: A Whirlwind of Fun and Exercise!

Hey there, homesteaders and chicken enthusiasts! Are you looking for a way to bring joy and excitement to your feathered friends? Well, you’re in luck! The brilliant minds over at My Positive Outlooks have shared an incredible idea—creating custom merry-go-rounds for chickens using old bike tires!

Why Chickens Need Entertainment

  • Mental Stimulation: Chickens, like humans and other pets, need mental stimulation. A bored chicken is a problematic chicken. They can start pecking at each other or even pulling out each other’s feathers.
  • Physical Exercise: Chickens need to move around to stay healthy. Exercise helps them maintain their weight and keeps their muscles in good shape.
  • Behavioral Benefits: Engaging activities can help mitigate problematic behaviors. Chickens that are occupied are less likely to engage in aggressive or destructive actions.

Featherheads Bird RescueFeatherheads Bird Rescue

The Basics of Building a Chicken Merry-Go-Round

  • Materials Needed: All you need is an old bicycle wheel and something to attach it to that allows it to spin.
  • Location: Place it in your farm or coop where the chickens like to roam.
  • Cost: This is a budget-friendly project. You might not even have to spend a dime if you have the materials lying around.

Expanding the Idea: More Than Just a Wheel

  • Treat-Dispensing Merry-Go-Round: Attach some of your chickens’ favorite treats to the wheel. As they peck at the treats, the wheel spins, providing both food and fun!
  • Alternative Materials: Run out of bicycle wheels? No worries! You can use an old side table with the top removed and something that can spin.
  • Hanging Chicken Treats: Think of it as a piñata for your chickens. Hang a cabbage or another treat from a rope and let your chickens peck at it.

DIY Duck and Chicken Run

Health Benefits for Chickens

  • Reduced Stress: Engaging in play and having a variety of activities can significantly reduce stress in chickens.
  • Improved Social Skills: Activities like these can help improve the social skills of your chickens, making them more amicable companions.
  • Enhanced Quality of Life: Ultimately, these activities can significantly improve the quality of life for your chickens, making them happier and healthier.

Community Involvement

If you’ve already built a merry-go-round for your chickens, we’d love to see them! Share your photos and experiences. Also, if you know friends and family who have pet chickens, don’t forget to share this article with them. Let’s spread the joy and make life better for our feathered friends!

Final Thoughts

Just like cats and dogs, chickens deserve our love and attention. Spoiling them with fun gadgets like these will surely bring variety to their days. So why wait? Start building your chicken merry-go-round today and let the fun begin!

Isn’t this just the most exciting thing you’ve heard all day? A big shoutout to My Positive Outlooks for this fantastic idea!

So, what are you waiting for? Grab those old bike tires and let’s give our chickens the time of their lives!

Harvesting, Drying, and Using Black Walnuts: A Comprehensive Guide

Hey, homesteaders and foraging enthusiasts! We’ve stumbled upon an incredible resource that you’ll absolutely love. Jan Berry, the talented writer and herbalist behind Unruly Gardening, has penned an exhaustive guide on harvesting and using black walnuts. From identification tips to harvesting and even medicinal uses, this blog post is a treasure trove of information. Let’s dive in!

Identification Tips

  • Leaves: Compound leaves with ovate-oblong leaflets arranged alternately along a shared stem.
  • Bark: Dark grayish-brown with deep furrowing and ridges.
  • Nuts: Round with rough green hulls that turn brown/black when left on the ground.

Black-Walnuts

When to Harvest

  • Season: September or October.
  • Quality Check: Press your thumb into the hull. If it leaves a dent, the nut is ready for harvest.

Removing the Hulls

  • Staining: Black walnuts stain everything! Wear gloves and old clothing.
  • Small Quantity: Use a hammer or rock to smash the hulls.
  • Large Quantity: Spread the nuts on a tarp and use a digging bar to smash them.

Washing and Float Testing

  • Washing: Use a corded drill with a paint stirrer attachment in a bucket of water.
  • Float Test: Place the cleaned nuts in a bucket of water. Discard any that float.

Curing and Drying

  • Why Cure: Curing makes it easier to harvest the nuts and improves the flavor.
  • Duration: 2-3 weeks.

Cracking and Storing

  • Tools: Use a hammer or the back of a hatchet.
  • Storage: Best stored in the freezer.

Medicinal Uses

  • Black Walnut Hulls: Antifungal and antibacterial properties.
  • Black Walnut Oil & Salve: Useful for skin ailments like athlete’s foot and ringworm.
  • Black Walnut Tincture: Used externally for warts, psoriasis, and fungal infections.

Additional Uses

  • Black Walnut Leaf Infusion: Can be used as a wound wash.
  • Poultice from Fresh Leaves: Useful for bug bites and minor bleeding.

Allergies and Precautions

  • If you’re allergic to tree nuts, avoid using black walnut hulls internally or externally.

Final Thoughts

The original blog post is an absolute must-read for anyone interested in foraging or natural remedies. Jan Berry has done an exceptional job in covering all the bases. For the full experience and to give credit to this amazing author, make sure to read the original post.

So, what are you waiting for? Get out there and start foraging for some black walnuts!

Frequently Asked Questions (FAQs) about Harvesting, Drying, and Using Black Walnuts

What is the best time to harvest black walnuts?

The best time to harvest black walnuts is during September or October. You can check the readiness of the nut by pressing your thumb into the hull; if it leaves a dent, it’s ready for harvest.

How can I remove the hulls from black walnuts?

You can remove the hulls using a hammer or rock for small quantities. For larger quantities, spread the nuts on a tarp and use a digging bar to smash them. Remember, black walnuts stain, so wear gloves and old clothing.

What is the float test for black walnuts?

After washing the hulled nuts, place them in a bucket of water. Any nuts that float should be discarded as they are likely to be bad.

How long should I cure and dry black walnuts?

Curing and drying should take about 2-3 weeks. This…

How To Make Homemade Canned Cherries

How To Make Homemade Canned Cherries | Homesteading tallest) { tallest = thisHeight; } }); group.height(tallest); } equalHeight($(“.dg-grid-shortcode .dg_grid-shortcode-col”)); $(window).resize(function() { equalHeight($(“.dg-grid-shortcode .dg_grid-shortcode-col”)); }); }); ]]> Sorry, this product is unavailable. Please choose a different combination. ]]>

25 Fall DIY Picnic Food Ideas And Crafts To Do This Weekend

25 Fall DIY Picnic Food Ideas And Crafts To Do This Weekend tallest) { tallest = thisHeight; } }); group.height(tallest); } equalHeight($(“.dg-grid-shortcode .dg_grid-shortcode-col”)); $(window).resize(function() { equalHeight($(“.dg-grid-shortcode .dg_grid-shortcode-col”)); }); }); ]]> Sorry, this product is unavailable. Please choose a different combination. ]]>

How To Build A Survival Winter Shelter To Get You Through the Night

How To Build A Survival Winter Shelter To Get You Through the Night tallest) { tallest = thisHeight; } }); group.height(tallest); } equalHeight($(“.dg-grid-shortcode .dg_grid-shortcode-col”)); $(window).resize(function() { equalHeight($(“.dg-grid-shortcode .dg_grid-shortcode-col”)); }); }); ]]> Sorry, this product is unavailable. Please choose a different combination. ]]>